Monday, October 31, 2011

A few pics from Caren's Phone

Finally a daylight shot of the stove and its accompanying backdrop. Eventually we will hang an iron pot rack from the ceiling to house all of the copper pots... yet another Craigslist find. Caren also found a place that has replacement thermostats, the only part that doesn't work, for the stove.

 If you'll pardon the mess... A longshot of the kitchen. There are doors for the backside of the island... they just haven't been finished yet. The counter top on the island is quite a story. I mentioned a little about it in a previous post. It now has been lovingly sanded and finished. All that is left is a final coat of varnish to toughen it up a bit.

And we're finally done!!! The fireplace is finished. See numerous previous posts for all of the labor that went into it. Caren and I spent all day last Saturday placing the ledge stone and making the final connections for the electrical and venting. On Sunday I milled, finished and placed all of the final trimwork. I am particularly pleased with the trim around the hearth. One of my first posts described all the angst that tying the rockwork to the flooring caused me. Turns out it was a relatively simple task, and Caren and I both think it looks great.

One of the reasons that there are no doors on the island pictured above is because Caren thinks that the same barnwood that is used above the mantle would look great on the backside of the island. I'm not entirely sold yet, but can see how it would tie everything together... elements of the fireplace behind the stove, elements of the of the mantle work on the countertop, elements of the island above the fireplace... you get the picture.

 The bear holds a tea light candle. Kelby picked it up for us on one of his adventures and thought it would fit the place perfectly... guess you could call it our first housewarming gift. Love the candle, but wanted to include this pic so one can see some of the detail work on the fireplace. My mitering skills are improving... as well they should be after all the mistakes I've made... I'm beginning to develop a few little tricks that help to make those pesky corners come out nearly perfect. I now see how much effort finish carpenters put into their work and why finish carpentry is truly a lifetime's trade.

Monday, October 24, 2011

Continuing the Work in Progress

Zach and Kelby met us in Tahoe on Saturday morning to lend some muscle to the next step in the saga that is the fireplace. See A Work In Progress for the previous steps. I needed their muscle to run the direct vent piping down the chimney. Picture fourteen feet of double walled galvanized aluminum pipe that is almost seven inches in diameter. Between the three of us we were able to wrestle the piping into place...

Then the fun began...

At the bottom of the chimney, where the flu would normally be, we attached a 90 degree elbow to start the horizontal run to the free standing gas fireplace. In order to achieve the correct elevation for the horizontal run, I had to remove four bricks from the back of the firebox. Curling up in a firebox with a chisel and a hammer is not fun, especially when the brick one is knocking out falls onto one's knee. Ouch.

Anyways, we got everything close...

Knocking the bricks out to make room for the direct vent piping... Caren had previously spent a few minutes cleaning out the area behind where the chimney flu normally sits. I thought she might find another squirrel or two, but she lucked out. The bricks came out relatively easy once the mortar was knocked loose using a stout chisel.

And I finished off Saturday by framing in the firebox...

On Sunday morning I fabricated the box that will eventually house the television. Caren and I decided to use barnwood from the Corning tear down. We wanted to leave the paint on it which meant that I didn't need to plane or sand it... simply rip it to width, cut it to length and wire brush it to remove any dirt and/or loose paint. 

I also completed the electrical rough in for the outlets that will power the television and the blower for the freestanding fireplace.

All insulated with spray foam and R19 fiberglass. The stove pipe gets hot when the fireplace is in use, so there are minimum set backs required whenever it is near combustible material... one inch on the sides and bottom, two inches on top. I left ample room all around...

All sheathed in...

Backerboard that will accept the mortar for the stonework is installed above the mantel. I still need to install it below the mantel but held off doing so until I have a thimble cover to support the vent pipe and insulate the area around it. Basically, a thimble cover is a 10x10 square of aluminum with a hole cut out of the middle of it and noncombustible insulation backing it. It works much like the plastic switch plates work that cover your light switches. I temporary insulated the hole to keep out any drafts, but the pink fiberglass insulation will be removed once the thimble cover is installed.

I also varnished the barnwood to seal it and finished the electrical work... 

All that is left inside is the thimble cover, rockwork and the final hook up to the freestanding fireplace... Hopefully next weekend!

Outside is a different story. This is what the top of the chimney looks like... loose bricks and a very decayed mortar bed. The direct vent pipe actually sticks out of the oval shaped chimney liner, but was not in place when I took this photo... regardless, the chimney is in need of serious repair.  I'm guessing that I will be on the roof sometime next weekend with hammer, chisel, and bucket of mortar. I also have a call into Bob's Heating, the goto guy in SLT for chimney flashing. He came highly recommended by the guys at South Y Fireplace, who were very helpful themselves during this whole process... anyways, hopefully Bob will be able to fashion some custom flashing that will protect the top of the chimney and keep the weather out.

I'm ready to be done with the fireplace...

Thursday, October 20, 2011

Oops!

When one tries to do things back to front or inside to out, one dramatically increases one's odds of screwing up...

I had an oh, sh@t moment in the shower the other day. Caren and I spent all that time last weekend putting in the kitchen window and trimming it out. Now we might have to tear the whole thing out come Spring.

The windows we purchased have a nail fin around the frame... which means that the window sits in the rough opening in the frame and the nail fin sits flush on the sheathing that covers the exterior of the house.  The only problem is that our house doesn't have any sheathing...

We installed the window and secured it to the 2x4's that make up the rough opening. I didn't even think about the sheathing... until I was in the shower on Monday morning...

I'm guessing that I didn't think about the sheathing because Caren and I had not "officially" decided to sheath the house when we replace the siding. With the horizontally hung clapboard siding, sheathing is not necessary. If one intends to wainscot the lower third of the exterior with corrugated metal and if one intends to side the house with vertically hung board and baton sheathing is a necessity...

Which brings me back to the window...

If the nail fin is installed on the framing, then the sheathing will cover the nail fin. What then, if, in the future, we have to replace the window because, say, a teenage boy throws a snowball thru it... cut back the sheathing and siding that is on top of it?

If we take the window out come Spring and install it correctly it normally wouldn't be a big deal. However, recall how much labor went into the trim on the interior. If the window is moved out three-quarters of an inch to accommodate the sheathing, half of the interior trim has to be remade from scratch... ugh...

Understand any of that??? Me neither, until I thought about it in the shower last Monday morning.

I'm sure that there are many creative ways that I can rectify the situation without tearing the window out. I have until next Spring to think about it, but for now, I will not be installing anymore windows until the sheathing is on the side of the house...

Monday, October 17, 2011

A Kitchen... Almost

We are nearly complete with the kitchen... if you count the kitchen as three walls. One wall contains the hoosier cabinet and stove, a second wall contains the rear door, the kitchen window, a sink, a refrigerator, and the pie safe. The final wall is the backdrop for the jelly cabinet and contains an additional window. Hmm, now that I list it all, maybe we aren't so close to being done.

Caren and I spent the weekend working on the rock and corrugated metal behind the stove and putting in the kitchen window...

After we installed the kitchen window on Saturday morning, we finished the rockwork above the stove and sealed the corrugated metal that sits behind the stove. A coat of varnish on the metal really brought out the beauty of the rust color. It was almost a shame to hide most of it with the stove. But we were really excited to get the stove into place and see how it all fit together. The ledge stone was a quick, simple process compared to the flagstone flooring at the front entry and around the fireplace... nice straight cuts! The only real challenge was getting the thinset mixed at the right consistency... too thin and it wanted to run down the wall, too thick and it was hard to spread. Wish I remembered to take a pic during the daylight hours. It is hard to see just how all the colors work together in the artificial light. All that is left on this wall is a little bit of trim work around the stone and some shelving in the right hand corner. I'll finish the trim work next weekend, the shelving will wait until we have the farmhouse sink in place on the right hand wall.

On Sunday we, once again, set up the trim mill in the front yard to process all of the trim work for the two remaining walls in the kitchen... pull nails, rough cut to size, plane, route, sand, oil, finish cut, sand, install, oil. This time, with Caren's help, it only took half a day. One never thinks about how many boards go into trimming a window until one has to mill all those boards... eight boards in all. If you count all the boards around the window, you will find that their are only seven. The final piece for under the sill came out just a little too short. I underestimated the total footage I would need before I started pulling nails. Hence the missing board. I ended up one and one quarter inches short. So, the final piece will wait until next time the mill is set up in the front yard... It may be a blessing however that we didn't place that last piece. This way we can get the sink in place and adjust the width of the final piece to accommodate the backsplash for the sink.

On this, the second wall of the kitchen, we still need to make a custom sink base. I'll model it after the island base that we purchased from Homewood Furnishings, but it will be a custom width and length to fit in the confined space. The wall also will get a custom cabinet fashioned out of barnwood from the Corning barn and a window we removed during the remodel of the Davis house. Add a little shelving and the wall will be done... on the inside...

This is what it looks like on the outside... because we are kind of going about this whole process bass ackwards, inside first then outside, we have to complete a lot of temporary work on the exterior to winterize the house. Next Spring, when the snow melts off, we will tear out all of that temporary work along with the siding and finish the exterior appropriately. But, for now, we have temporarily winterized the exterior wall. To install the door and window, we had to cut back the clapboard siding to expose the rough openings. Once the window and door were installed we put up the temporary trim (1x4 pine ripped to size) and caulked all the seams. This pic was taken about two-thirds of the way thru that process. Tom, the neighbor, suggested that we just throw a sheet of plywood over the door for the winter to protect it. Caren cringed when she heard that. She wants the light that it lets into the house. I'm still undecided. If it is a big snow year, snow will reach the second row of lights... that's a fancy term for the glass panels in the door. If I put up the plywood, I wont have to shovel the snow away from the door. If I don't put up the plywood, Caren will be happy, but I will be shoveling...

The third and final wall of the kitchen is nearly complete as well, We just have to install the windows. That means more temporary winterizing on the outside, and setting up the trim mill again for the inside. Sounds like another full weekend of work. Maybe next weekend, if we don't try to finish the fireplace instead...

Tuesday, October 11, 2011

Of Doors, Casing, and Baseboard...

The kitchen is nearing completion... most of the hard work is finished. The walls are up, the floor is in, the furniture is nearly finished and the appliances are purchased. Last weekend we set the door in place and put up the trim. It's been a long process...

Remember this? By the way... we sold the range and refrigerator on Craigslist for $600, the cabinets, and counter tops earned us another $200, the sink and carpet got us another $50, while the fluorescent light fixture netted another $20. Kind of fun to see money coming in instead of going out... anybody want a beast of a microwave from about 1988? You can have it for free!
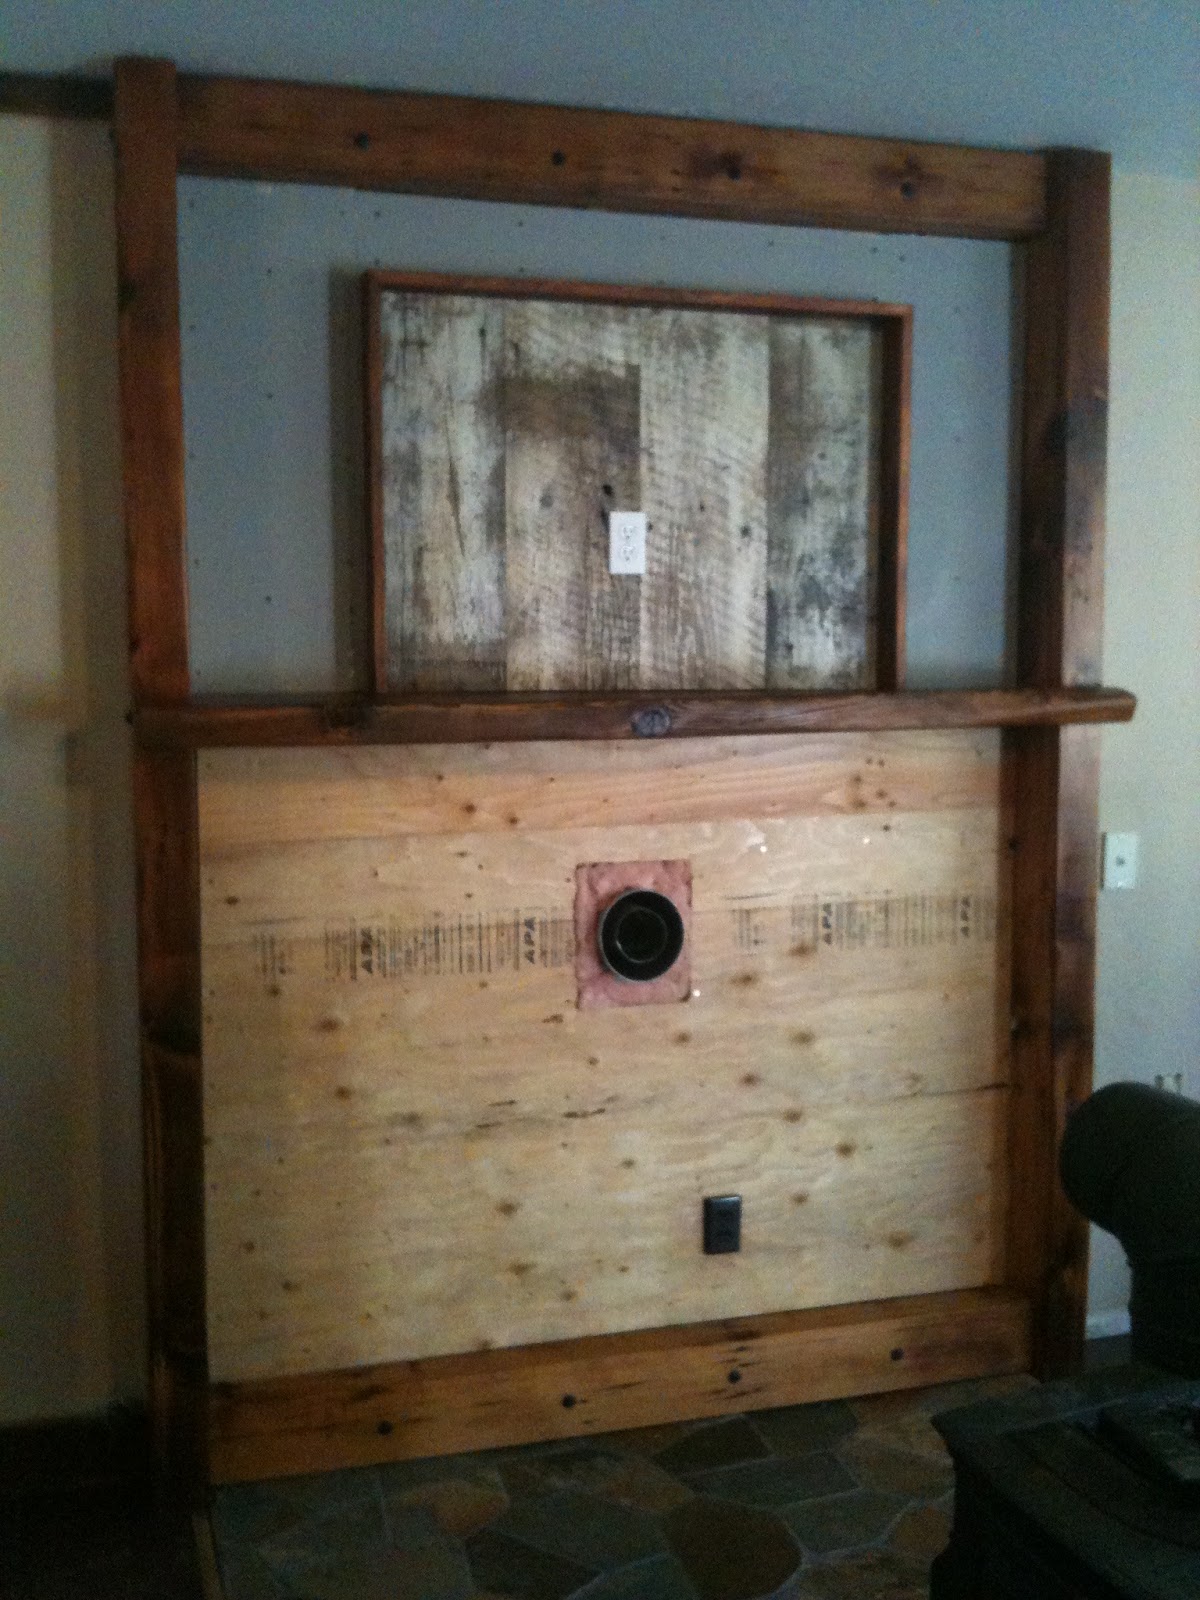
And this?

It now looks like this...

And this!

Both of the most recent pictures are fairly dark. That is because I was so busy putting the door in and milling all the trim work that I forgot to take pics until it was nearly dark outside. The lighting in the kitchen is pretty minimal right now so it doesn't do the room much justice. Lighting is on the to do list. Caren has big plans, most of which involve me crawling around in the attic, wrapped up in a pile of 14 guage two wire with ground...

Anyways, busy is the right word when talking about last weekend. I thought the door would take two to three hours to hang after Caren had done all the finish work on it. I keep shorting myself on time. It took all day to hang the door and two trips to the hardware store. The first trip was planned--to get flashing and bitch tape to make a water tight pan. The second trip was for temporary exterior trim and replacement deadbolts.

The water tight pan was easy enough. We struggled a little getting the door to hang square and plumb because the floor is not quite level (recall all of the house jacking I blogged about earlier). The big problem was the lock. I'd purchased a set from Home Depot... oil rubbed bronze, extra secure. Seems as though somebody had purchased the exact same set before and returned it... after messing around with it and mixing it with another set. First, there were two key sides and no interior locking mechanism. Second, the key was not correct for the either of the two key holes. Hmm? No problem. I'll return it to Home Depot and use the matching one that I purchased for the front door... The key that came with the front door lock didn't work either, and the interior locking mechanism was missing parts. Hmm? It gets better... The key from the first box opened the lock from the second box, while the key from the second box didn't open either lock. My guess is that somebody purchased both sets from Home Depot along with at least one other set, proceeded to mix all three sets up, lose pieces and then return them to Home Depot. Unwittingly, Home Depot placed the returns on the shelf, and I blindly purchased both of them. What are the chances??? After much cussing and consternation, both locks are going back to Home Depot and off to the local hardware store we went. Fortunately, Meek's had the same set in unopened boxes. When all was said and done, the day was nearly over, but the door was in and insulated with spray foam. I also temporarily trimmed the exterior to protect the door and insulation from Winter's ravages. The final exterior trim work will be finished once we reside the house next Spring.

The interior trim for the door took another whole day, but I planned for that...


This is where all the millwork on the trim was completed. By Sunday most of last weeks snow had melted off and the ground was dry, so I was able to work outside albeit with a jacket on.

I spoke with Jesse, purveyor of the redwood barn siding that we purchased for the trim work and asked him why there were so many nails in the wood. The siding wasn't actually siding. It was roof decking. No big deal, except that roof decking gets shingled and every shingle gets nailed. Peal the roof off of a hundred year old barn and most of the nails break off because they have rusted nearly thru. The rust and nail holes make for very cool distress marks in the wood, but every nail must be removed before the boards can be run thru the planer.

The first step of the milling process involved punching the rusted off nails thru the board with a nail set and pulling them out the other side with vice grips. At three to five nails every linear foot with over eighty linear feet of trim, that is an awful lot of nail setting and vice gripping. I'm saving all of the nails and will display them prominently in a glass jar as a reminder of the painstaking labor of love!

After pulling all the nails each board was rough cut to size before running them thru the planer. By rough cutting the boards I could work around cups and bows, cracks and knots and make the planing much simpler.

Planing the boards involved several passes on each to find a workable surface. When all was said and done each board was planed down to exactly 9/16th of an inch from the original 3/4 inches. I think I hit one or two nails with the planer that I missed in the first step, but they didn't seem to damage the blades on the planer at all.

After planing, Zach helped me route the the top edge of any pieces that would be placed horizontally to give them a quarter round profile. We decided to leave the vertical pieces square and just knock off their edges with a sander.

Step five was sanding. I spent about an hour and a half up close and personal with the disk sander and a box of 180 grit discs. My hands didn't appreciate the effort and seemed to vibrate for an hour or two more.

The next step was cutting the boards to their final lengths. I allowed myself a sixteenth of an inch tolerance and measured thrice before cutting once. After all, it wasn't like I could run down to Meek's and pick up a few extra linear feet if I screwed up. Instead I would have to go all the way back to step one, and there weren't enough hours in the day for that. I did blow one cut... hence the lack of baseboard to the right of the door. However, that will be rectified when I repeat the process for the trim in the living room and around the front door.

And finally after cutting, each board was oiled with Watco in a natural finish. The finished product made the labor intensive process well worth it.

Alex and Zach were around long enough to observe/help with the whole process, lending a third hand when needed. So I figured I'd let them have a go at the nail gun. They enjoyed the work, but seemed more interested in how similar the nailer sounds to a paint ball gun than the finished product. They did comment on how cool everything turned out tho.

All that is left to do in the kitchen is... well, maybe there is a lot left to do... hang and trim the window, finish the stonework above the range, lighting, built in shelving, sink base and counter top, hook up the Detroit jewel to the gas line, rebuild the refrigerator, etc, ad infinitum... Maybe we aren't so close after all.

We did finish two of the pieces of furniture this week and are excited to get them up to the place on the weekend.

The pie safe and jelly cabinet just need a final coat of varnish or wax to protect them. Caren gets to decide on which it will be. She plans on completing that task tomorrow. She is scouring the internet for just the right drawer pulls and door knobs as I type this. If one looks closely at the picture, one can just see the antiquing we did on the edges of each piece. It is kinda scary to have spent so much time applying the paint and stain only to take a sander to the edges, but we both think that they turned out really cool. It is the small details like the knobs and antiquing that we really love... the things that make each piece unique, our very own!

Monday, October 10, 2011

The Finish Shop

Caren and I got enough work done in the kitchen and living room this past weekend that the place is actually starting to feel like a home. We are close to moving furniture in... but what furniture?

We spent a lot of time thinking about the kitchen layout. It is a small space, but we wanted it to feel open... not overwhelmed by cabinetry and furniture. After a lot of discussion, sketching, and placing blue painter's tape on the floor to outline potential layouts we decided to go with a free standing kitchen.

Caren found a hoosier cabinet on Craigslist that was crafted in England in the 19th century. It is absolutely beautiful and in incredible shape for something as old as it is. I'll have to create a post dedicated to it to fully describe it.

I've mentioned several times the other great Craigslist find... the 1921 Detroit Jewel gas range. We should have it in place next weekend. I'll post some pics then.

The rest of the furniture we purchased from a dealer in Sacramento, Homewood Furnishings. The three pieces that we bought, a pie safe, a jelly cabinet, and an island (sans countertop) made by Woodcraft Industries were unfinished... which means we had to find a place and time to finish them.

As luck would have it, Caren's tenants in her rental space moved out at the end of September and the new tenant has yet to move in. Not wanting to let the space go to waste, we moved our unfinished furniture in and began picking away at it as time would allot...

The disaster that the place once was... pie safe on the left, primed for paint with doors removed for oiling; island on the right serving as a makeshift counter top; drawers and doors on a makeshift workbench in the background after receiving their first coat of oil.

We ordered the island without a counter top on it because we had plans for some of the barnwood we bought from Jesse after he took down the Colussa county barn. I spent two evenings planing, sanding and jointing eight 2x6's that we bought from him, forming a rough top that measures 64"x48". It will serve as our dining table as well as a food prep surface in the kitchen. A third evening was spent trimming the top out. Now all that is left to do is a ton of sanding and finishing.

The pie safe currently has three coats of hunter green on the body and three coats of Watco oil on the top, drawer, and doors. We wanted to match the finish of the flooring and fireplace work as best we could so ended up mixing a cherry colored oil with a dark walnut colored oil to give a dark red tint to the wood. All that is left to do now is antique the edges of the cabinet and finish coat it with either wax of varnish.

The island, most likely, will be a mix of antique white and the red tinted oil, while we are leaning toward a dark stain for the top.

The jelly cabinet with the door and drawer removed for finishing... this piece currently has three coats of brick red on the body, the door and drawer are stained to match the pie safe. This cabinet will serve as our pantry.

In the background on the left is the refrigeration unit for the 1930s GE refrigerator. It too needs finishing. Just heard from the powder coater today that the body of the fridge is finished and ready to be picked up. Should have at least some of the wood furniture out of the space by this weekend. Then I'll turn the rental unit into a refrigerator restoration shop. But, for now the furniture finishing goes on... an hour or two at a time.

Let's see... Hoosier Cabinet, Gas Range, Free-Standing Cabinetry, Island... what else? what else? Oh... the sink and its accompanying counter top... Caren found a brand new apron front sink on, you guessed it, Craigslist from a dealer that was going out of business. She recruited Zach to help her pick it up because it weighs about 180 pounds--cast iron and porcelain. My job is to design and build a sink base for it that will match the pieces we purchased from Homewood Furnishings. Hopefully I can get that done before next Spring! The rest of the kitchen will be made up of shelving crafted out of barnwood from the Corning tear down and an old window that we took out of the Davis house a few years ago. It will be incorporated into the only piece of cabinetry that we will have hanging on the wall. If I can get the sink base built by next Spring, I just might get the cabinet done by the late Summer... My job is really eating into my hobby time.

Tuesday, October 4, 2011

Bedrooms and Kitchens or All's Well That Ends Well

Last Saturday was spent prepping one of the bedrooms for flooring. Caren painted the walls while I pulled staples left after pulling the carpeting and padding. We'd meant to leave the carpet in the bedrooms for awhile, but after listing the carpet that we pulled from the living room and hallway on Craig's List we were able to sell all of it, including the bedroom carpet to a buyer that was in need...

John was an interesting character. He drove over an hour with his adult son to pick up our nearly brand new carpet. The bank had put the carpet in to make the house more salable; Caren and I chuckled knowing that we were just going to rip it out. Anyways, we placed an add on Craig's List for the carpet wondering if we'd get any interest. It is amazing how many people want used carpet. John was the lucky winner of our carpet. When I talked to him on the phone I told him that he could have the bedroom carpet also... once we pulled it out. John loved to talk. He talked our ears off about our project... the fireplace, the floors, the paneling. He also talked us into pulling the carpet from the bedrooms so he wouldn't have to make a second trip. I couldn't refuse when he said that he and his son would provide the labor. Long story short, the carpets were out of the bedrooms and we had the flooring and the nailer, so...

Laying the flooring is pretty simple so long as one only has to do one room. Start on one wall with the tongues facing out. Face nail the first row near the wall, then use the nailer to nail down the tongues, slot the second course into the tongues of the first course, nail the new tongues and repeat until one reaches the far wall. Super easy until one has to join a second room. We'd finished the living room, kitchen and hallway a couple weeks ago. The front bedroom was next on the to do list. The problem was that we had to work from the hallway into the bedroom, but the last board in the hallway had the groove side facing the bedroom. Let me remind you that the nailer is designed to nail the tongues... not the grooves.

Problem... how do we turn the boards around in the bedroom so the tongues face the other direction without making an awkward seam? Solution... I used a biscuit cutter to widen the groove on the board in the hallway and the first board to be placed in the bedroom. Then I used biscuits to serve as a tongue that would join the two and... presto... the boards in the bedroom were facing the right way.

Caren and I are getting pretty proficient at laying hardwood flooring. We had the bedroom completed by noon on Sunday, leaving enough time for some more fun. I say fun, because I was really excited to try out Caren's idea for the wall behind the stove in the kitchen...

Our 1921 Detroit Jewel stove will fit in between the two posts. Above the shelf will be covered in the ledge stone you see in the pic. Below the shelf we were going to place vertical 1x12 barnwood siding that we got from the Corning barn tear down, but Caren thought rusty corrugated might look cool. Kelby and I had dug about 250 square feet of the stuff out of some blackberry brambles in Placerville two weeks ago, so I said I'd give it a go...

Over the next two or three hours, I selected three pieces that were uniformly rusted, cut them to size, and used a wire wheel mounted on my drill to remove any loose rust. That last sentence makes it sound simple. In reality, cutting corrugated metal with tin snips is no small task. Tom, the neighbor, came home just as I was finishing the last cut and offered his larger tin snips... just a little too late. I definitely will be buying a blade for my circular saw that can cut metal before I tackle the pile of tin that will wainscot the exterior of the house.

The tin is just set in place for now. I haven't decided if I want to rust a bunch of sheet metal screws using muriatic acid to screw the tin to the wall or buy bronze wood screws from the Blacksmith's Depot that provided the black lag screws for the fireplace. Decisions, decisions...

In the pic one can see the gas stub that will supply fuel to the stove. I did think far enough ahead to cover the stub with the blue tape to keep debris from falling into it while we work on the wall. One can also see the floor vent that Tom, the plumber, moved for us. We were able to have him place it under the stove because the Detroit Jewel stands well off the floor on Victorian legs.

So, after a long day we had the car loaded with dogs and coolers and dirty laundry and were ready to head back to the valley by 6:30. Caren waited for me in the car while I locked the place up. Once in the car, I asked her where the keys were. She looked at me kind of funny and said, "I left them in the house so you could lock the door." The door doesn't have a deadbolt and can be locked from the inside before closing the door. I locked the door before I closed it. A few minutes later I was worming my way thru the only window that I could get open...

The bathroom window is eight inches tall and thirty-two inches wide... one of those narrow little slider jobs. Once I got it slid open I had an eight by sixteen hole to squeeze thru. Good thing I'm such a skinny little cuss. Mind you that the window is about eight feet off the ground, so picture me standing first on Caren's shoulders, then on her outstretched hands, and finally with just my feet sticking out of the opening while I slid head first down into the shower stall.

Caren is kicking herself for not taking pictures, but in her defense, she was laughing and shaking so hard that the pics wouldn't have turned out.

Anyways, all's well that ends well, but I think I will put a deadbolt in the new front door once we install it...