Thursday, August 23, 2012

Porch Pictures

I guess that the front porch has been the biggest piece of the Tahoe Project to date. Very labor intensive. Lots of inspections. Lots of $$$.


It started simple enough, just a couple of holes in the ground... eighteen inches deep, eighteen inches square, centered exactly six feet from the house and seven feet apart, racked for square, reinforced with rebar. Then the inspector would look at my holes in the ground. Who'da thunk that one needed to have holes inspected.


Kelby and Caren helped with the pour... a continuous pour, footing and pier at the same time. Six fifty pound bags of ready mix per hole and a about thirty pounds of cement mixed in for strength.


Of course, when one pours concrete, on must personalize it in someway.


Post are set... being extra careful to make sure that they are perfectly plum. We distressed all of the timbers before hand using a chisel and a sawsall. I have complete and utter respect for the the work that Richard does at Pioneer Log Siding. Distressing just the lumber for the front porch was a lot of work. I can't imagine how much time Richard spent on all the siding for our house.


 After the posts, the beams and deck joists... we also pre-stained all the lumber. The deck supports are tied to a ledger that is bolted to the house framing... not such an easy task considering that one must crawl into the coffin corner under the house to tighten the bolts. The beams slipped into beam pockets we created in the house framing as well.


After all the beams were hung, we played around with roof pitches. 12 in 12? 8 in 12? We final settled on 10 in 12.


Rafters, and ridge beam, California framing on the original roof deck. Cutting bird's mouths in 4" by 8" rafters and creating a tight joint is not an easy task. I struggled with it. Working very carefully, it took me two days to put up all the rafters. The joints aren't perfect, but they are close enough.


Then it started to rain... nary a drop all summer long, but as soon as we get the roof opened up, a weeks worth of afternoon thunder showers appears in the weather forecast. Caren complained about spending a hundred dollars on tarps, but when I explained that the alternative was spending several thousand dollars on new drywall and insulation, she reconsidered...


2x6 T&G roof decking... as well as the first of the shingles removed from the original roof.


and finally the corrugated metal on the gable to match the wainscoting under the windows. We used ice and water tape to cover the entire valley where the two roof planes tie together and 24 inch valley flashing. I don't think we will have any leaks. Keep your fingers crossed.


Finish up the siding around the front door... and with a few tens of hours of labor, we go from...
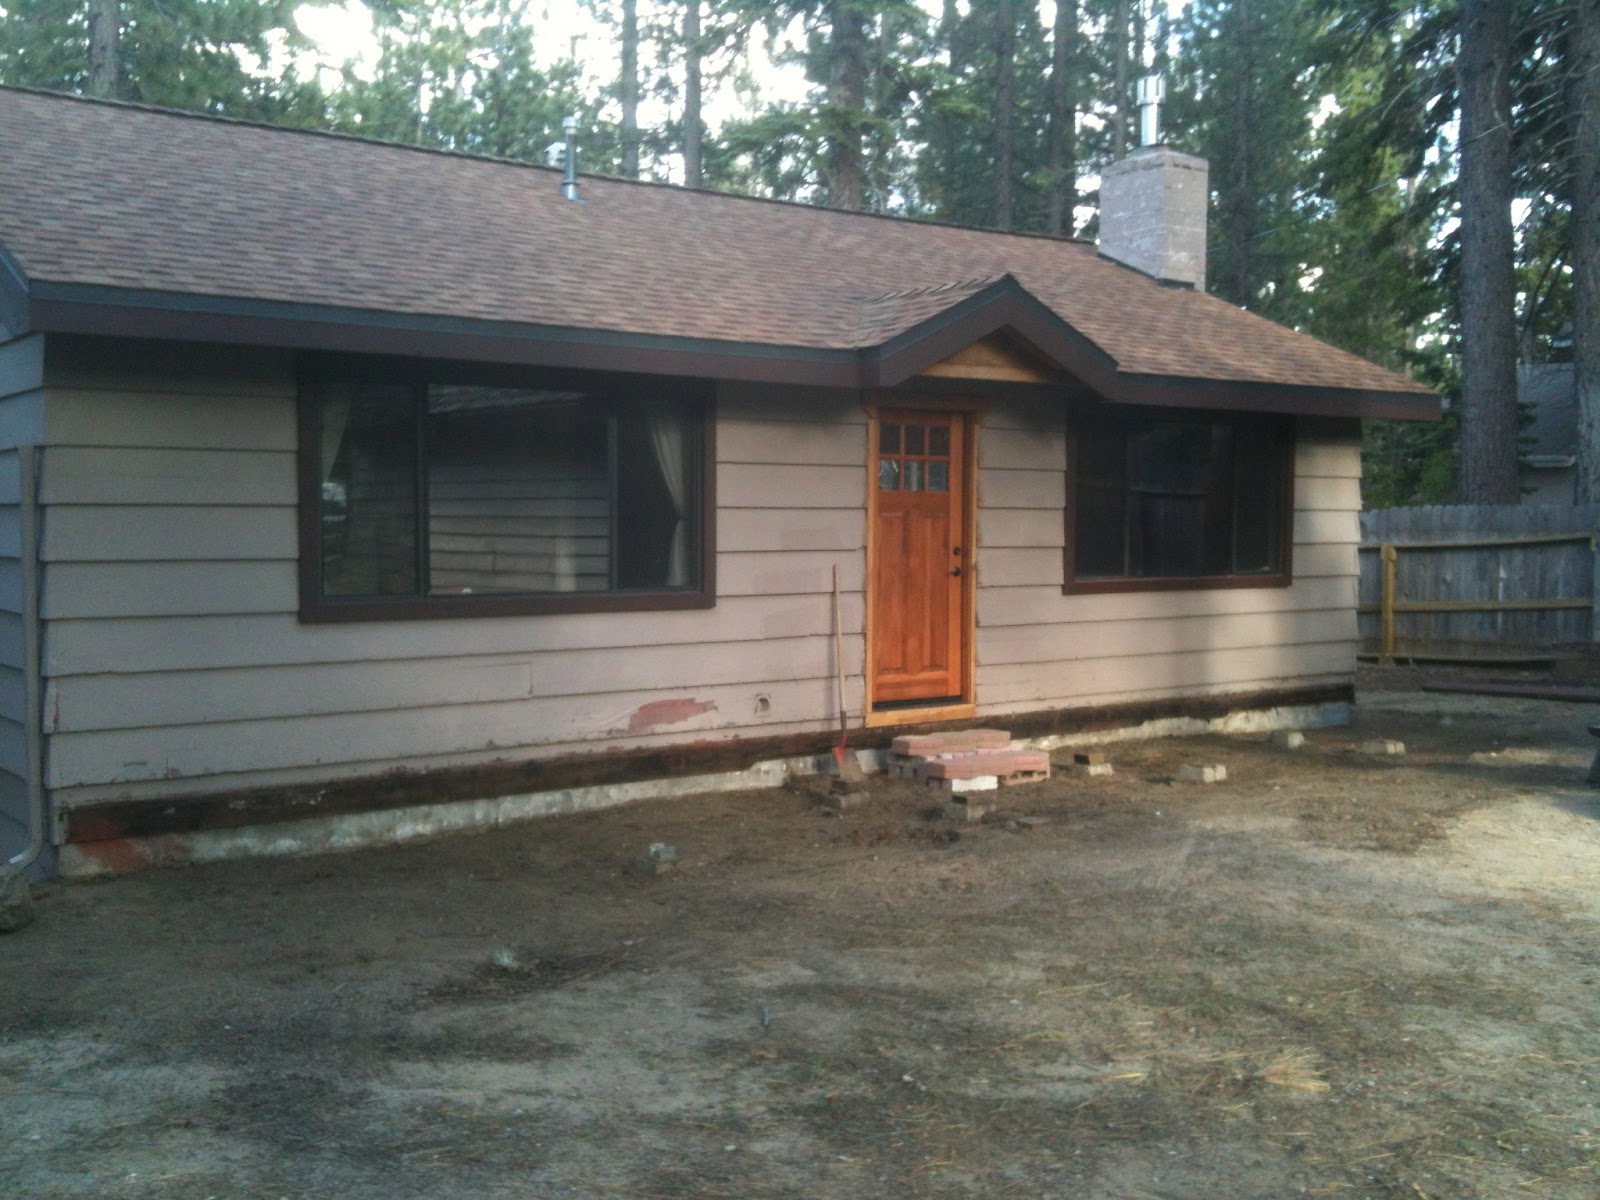

This...


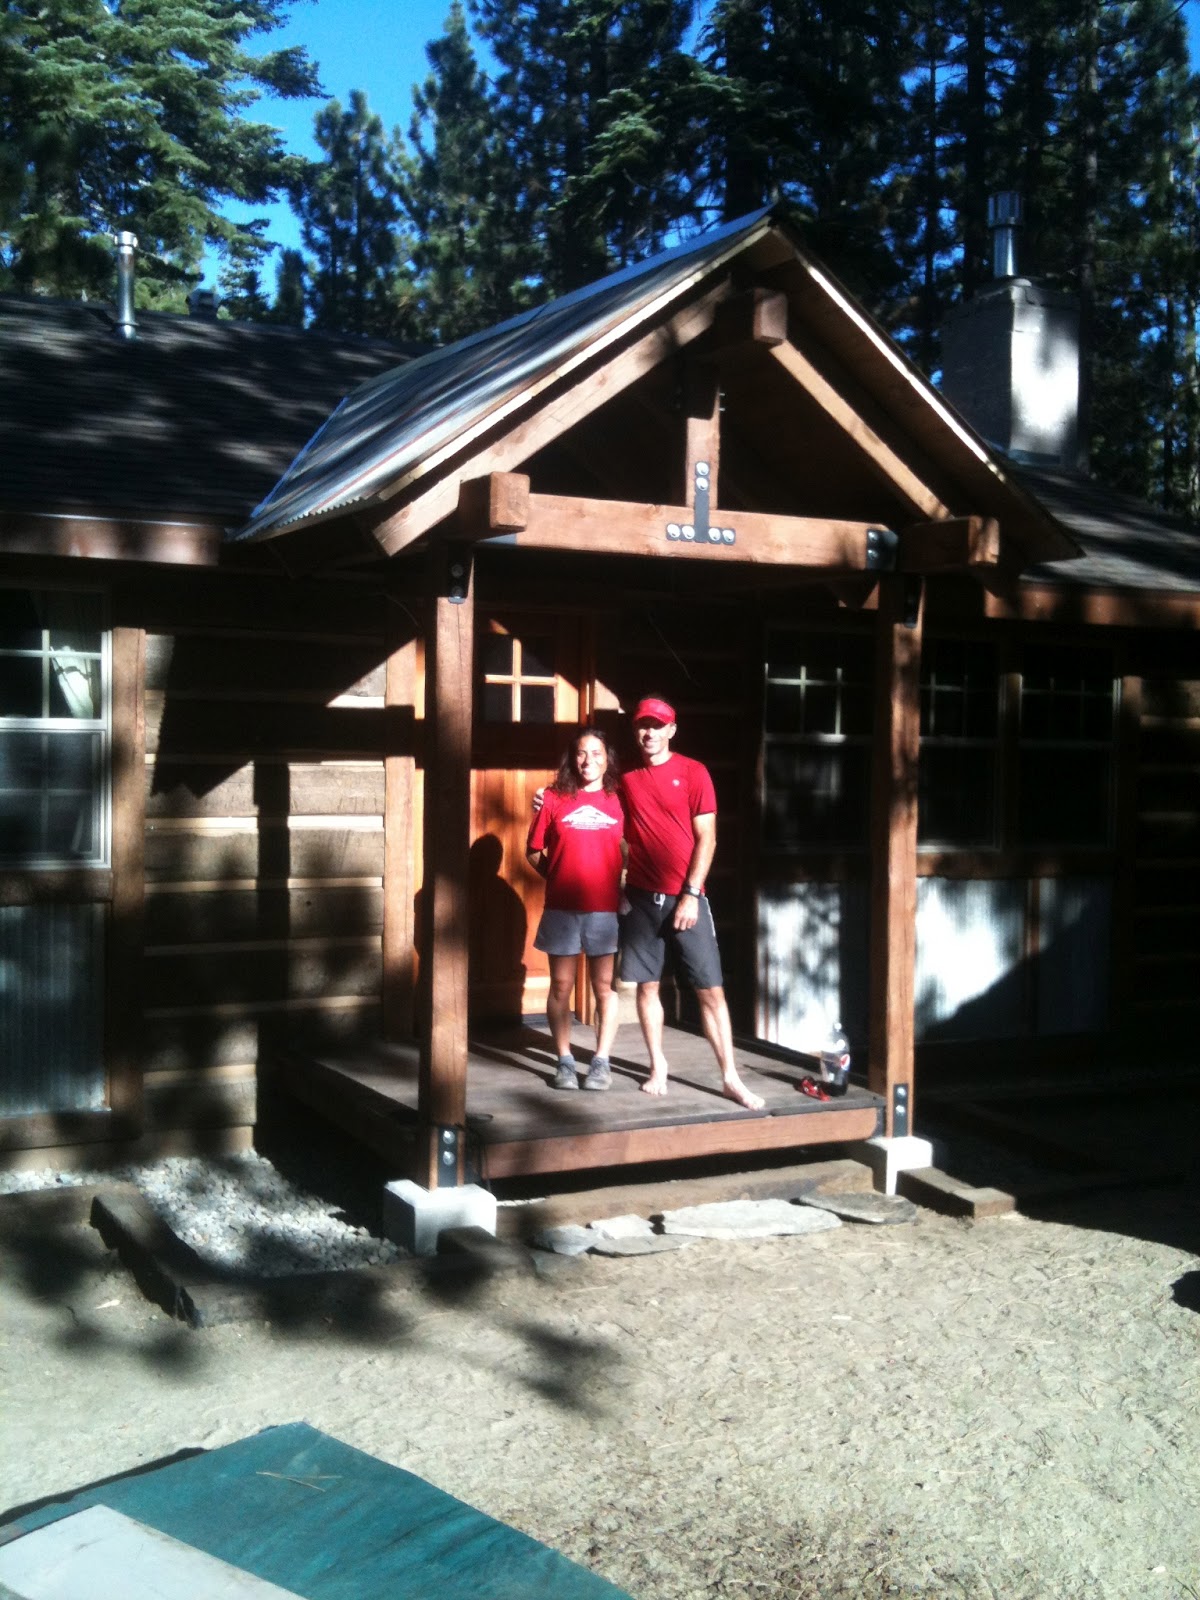
To this... making us very happy campers!

Monday, August 20, 2012

In Between the Lines

Back when they used to make cabins out of logs, they would fill the gaps between the logs with a mud and straw mixture called chinking... They might still do that in some parts of the world, but not in Tahoe.

All of the gaps between our Pioneer Log Siding needed to be filled, just as if it the cabin was built with actual logs. We didn't use mud and straw. We used Permachink. Permachink, according to all that I read and was told, is vastly superior to mud and straw. It is applied with a caulking gun instead of by the fistful. It is weather tight and moves with the siding as it expands and contracts with the weather.


When one uses mud and straw to chink ones house, one doesn't need to calculate how much chinking to purchase. Given that a five gallon bucket of Permachink costs upwards of $250, I didn't want to overbuy, so I spent an evening calculating how much chinking we'd need for our little house.

After coming up with some way off base numbers, I finally resorted to the only thing I remember from high school chemistry... conversions. I should have taken a picture of my scratch work, but didn't. It looked something like this:

650 linear feet x 2 inches wide x 3/8 of an inch deep = 534 cubic units... but what units? Oh wait...

650 ft x 12 in/ft x 2 in x 3/8 in / 231in/gal / 5 gal/bucket = 5.06 buckets... follow that???

After checking and re-checking my work, I ordered five buckets of the stuff.


Permachink is applied over the plywood spacers that I mentioned in a previous post. It also is applied over foam backer rod. The foam fills large gaps and cracks. So, after filling all the gaps and cracks with foam, Caren and I set about chinking. And we chinked for days... I would apply the chinking using a Cox gun (basically a caulking gun on steroids) and Caren would smooth it using what amounts to a spatula.


I think that what we ended up with looks pretty authentic. As of today, we have finished chinking about eighty-five percent of the house. The remaining portions will involve scaffolding and ladders. Caren doesn't like scaffolding and ladders, so we have been putting off the last few courses of chinking.