So, let me take you back several months...
 Shortly after we closed on the house, Caren and I found the Detroit Jewel Stove on Craigslist, and, of course, we ended up buying it. We didn't know it at the time, but with that one action, we set a whole chain of events in motion. The era for the decor was set with that one simple purchase.
The first problem we ran into was how to find a refrigerator that fit the 1920's motif. Refrigeration was not even mass produced until the late years of that same decade. Most homes had ice boxes, and ice was delivered much like dairy products were delivered when most of us were growing up. Ice deliveries would have been rather hard to come by (at least during the summer months), so we figured an ice box was out of the question. However, rumor had it that turn of the century ice boxes had been converted into refrigerators, so I started poking my nose about.
Conversion ice boxes were way, way out of our price range, but I did, with Caren's help, discover GE Monitor Top refrigerators.
The first Monitor Tops were produced in 1927 and sold as an add on to one's electric bill. GE would add $10 to each month's bill until the refrigerator was paid for in full. A new Monitor Top went for around $300. By comparison, a Ford Model T went for about $450 during the same era. None the less, GE sold over a million refrigerators... making the Monitor Top the first mass produced home refrigeration unit. It is interesting to note that the units were not named Monitor Top by GE. That moniker is a nickname bestowed on the refrigerator because of its resemblance to the turret of the USS Monitor, the Civil War era ironclad battleship.
What could be more perfect than a refrigerator that met our decor demands to the t? I started looking into pricing. A fully restored Monitor Top will cost you between $2400 and $3400. That is a pricy fridge. Fridges in as is condition run anywhere from $250 to $1000. National searches for Monitor Tops on Craigslist were not inspiring... Most of the adds showed pictures of rusting hulks and ran copy that said something like, "I think it worked last time I plugged it in... during the Eisenhower years."
I was about to give up the search and was trying to figure out a way to talk Caren into a $1400 partially restored unit that was for sale in SoCal... partially means "It still runs, and we gave it a coat of spray paint." when I found an auction on eBay for a working Monitor Top in Sacramento without a reserve on it. No reserve means that there is no minimum price that the seller will accept. If the top bid is $1 that is what the piece sells for. I placed a maximum bid of $120 and ended up winning the auction with just $108.
Within hours Kelby and I were at a storage facility in Sac exchanging cash for a very heavy refrigerator. That very fridge is pictured as we first saw it in the photo above. The seller was the granddaughter of McClatchy of Sacramento Bee frame. The Monitor Top we were purchasing was the household refrigerator in the McClatchy residence for years. Supposedly it still ran, but it had definitely seen better days. The door was stuck shut as the seal had long since glued the door to the box, there were minor rust spots, dents and dings, and the wiring was cracked and frayed.
By the time we had the refrigerator loaded into the back of the truck, we had tipped it over (it is very top heavy) and broken the cord that supplies electricity to the refrigeration unit.
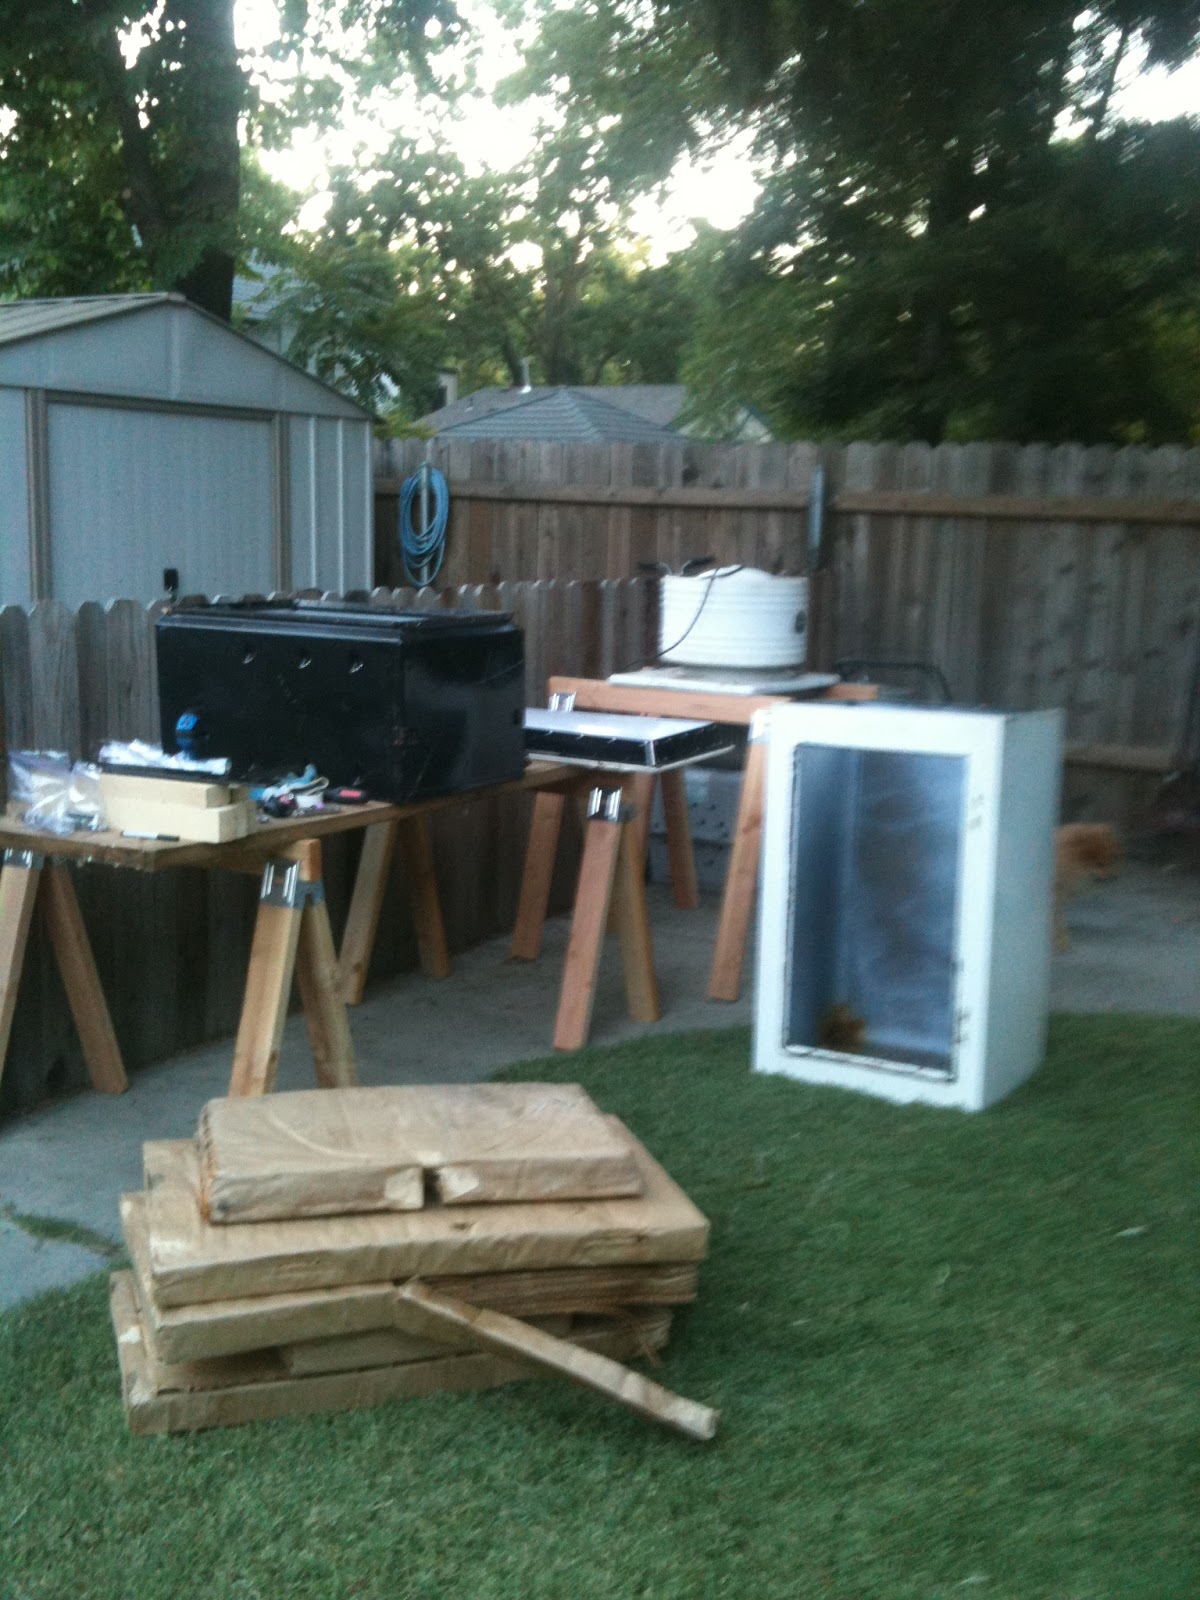 Shortly after we brought our purchase home, it looked like this in the back yard.
But... before I began dismantling, I repaired the cord enough to supply power and plugged the Monitor Top in... and listened to the sounds of silence. No humming, no whirring, no clunking... nothing but silence. I checked my electrical repairs and resigned myself to the fact that Kelbs and I broke the unit when we tipped it over, or it wasn't working when we bought it... Caveat emptor! (another dollar for you Zach if you can translate that)
About that time Caren came outside, and I expressed my disappointment. She asked if I had turned it on while flipping the switch... hum, whirr, clunk. Oh sweet cacophony of noise.
Soon I was digging into the piece to see how much restoration I could do on my own and how much I was going to have to farm out.
The mechanical and wiring I could do, the paint and enamel I could do, but not well, the refrigeration nobody could do, at least legally. Fortunately the refrigeration was the one part of our Monitor Top that did not need work. After Caren flipped the switch from off to on, the ice box began to frost up almost immediately. That was cool, literally. Anyways, had Kelby and I broken the refrigeration lines we would have been out of luck because Monitor Tops use sulphur dioxide as a refrigerant. Sulphur dioxide causes blindness and is caustic to the lungs. Sulphur dioxide was outlawed as a refrigerant in the 1930s. Nobody repairs sulphur dioxide refrigeration units.
Very carefully I continued dismantling my baby. I considered having an autobody shop paint the whole thing. I considered spraying it myself, I decided to have it powder coated. Powder coating requires that the unit be heated to 400 degrees. All the plastic, insulation, wiring, and aluminum had to be removed. It took me two days of removing pieces one at a time, diagramming and labeling as I went... legs, interior box, exterior box, top, insulation, wiring, handle, badges, door panel, plastic trim, latch, light switch, seals... there are a lot of parts to a refrigerator.
All American Powder Coating did an amazing job. Shiny white, no runs, no drips, no errors...
And re-assembling the exterior was easy...


Assembling the interior was not so easy.


The left picture above shows the door and exterior box before any insulation or panels were installed. The right hand picture shows the door panel and insulation installed. Notice all the shiny silver rivets holding the black plastic that attaches the panel to the door??? Originally they were aluminum screws. When I dismantled the door and box about half of the screws stripped out, twisted off, or were seized up. I had to drill out far too many to count. As I drilled each one out, I wondered how difficult it would be to tap the holes when I replaced the screws... until I thought of rivets. The rivets were much easier than tapping new threads, but still it was a labor intensive process. There are a lot of them. After insulating the box with rigid foam panels and spray foam, the same process that attached the panel to the door was repeated to attached the interior box to the exterior box.
It took three or four days of work, but soon all that I had left was this...

This a close up of the refrigeration unit after I had stripped it of all its wiring, insulation, and decorative badges. Notice the icebox still attached, as are the delicate refrigeration lines. Notice also that there is no powder coating. The refrigeration unit could not be heated to 400 degrees because of the refrigeration lines full of caustic sulphur dioxide. Spray paint was my only option for restoring the unit. All American Powder Coating supplied me with the paint to match the powder coating. After carefully transporting the unit to Tahoe, I was able to spray the refrigeration unit. There are a few runs, drips and errors, but the color and finish matched the powder coating perfectly.
 And now for the wiring... the wiring was not easy, it was not hard, it was most difficult... After numerous trips to Lowes and Home Depot and ACE and Hibbert, I started with the easiest of the difficult. The cord that runs from the wall outlet to the refrigeration unit is split by a plug that powers the interior lighting. The plug was in bad shape, but I couldn't find a suitable replacement online or in store. I was left with no other option but to rebuild it. So I bought a soldering iron and rebuilt it. Soon enough, with Kelby's help, I had an operating interior light. On to the more difficult of the most difficult...
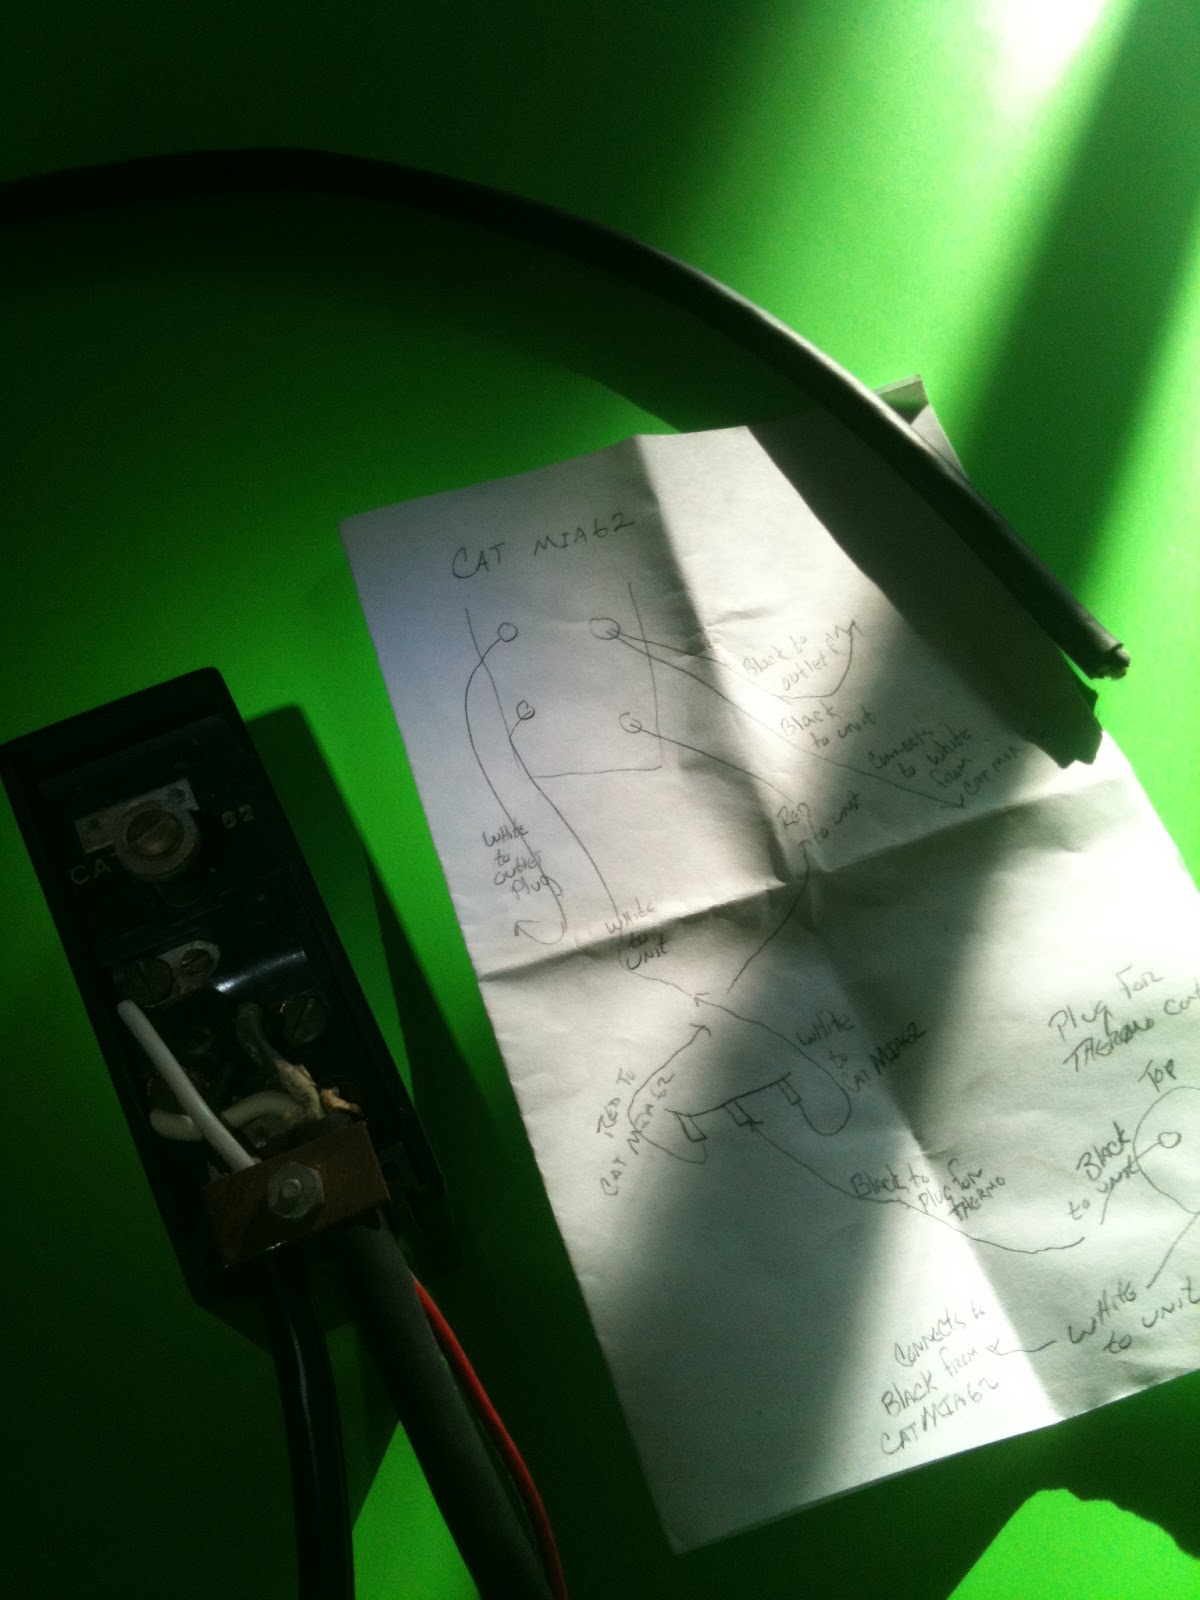

My wiring diagram, drawn months before, was all I had to go by...
My work space, remembering that I couldn't remove the refrigeration lines, was very limited...
It took me several hours and Caren's tiny hands to get the new wiring routed, soldered and connected before I was ready to test my work out. I plugged the unit in... no humming, no whirring, no clanking... and I remembered to flip the switch. What did I do wrong. Several more hours of testing and rewiring and still no humming, whirring, or clunking. Frustration... I was near the point of giving up and concluding that we had broken something in the motor during all the months of handling and transporting. Disappointment! All for naught?
Out of desperation, I fashioned a jumper out of a spare piece of wire and began jumping connection points... Jumping connections is almost a sure fire means of shorting out the motor or frying the wiring. It was an act of desperation... a spark here, no spark there... what's that? A hum? A whirr? A clunk? Jump that connection again. Hum, whirr, clunk. "Caren, put your hand on the freezer box, is it getting cold?" Ah, sweet relief!!!
If you look closely at the wiring diagram picture you will notice two white wires attached to the control unit. Despite my careful diagramming all of those months ago, I mis-diagrammed the attachment point for the two white wires. After switching them, the refrigeration unit work just as it did the day it rolled out of the factory over 80 years ago!

Tom, the neighbor, helped me lift the 150 or so pound refrigeration unit and place it on the box. The long saga was finally complete... nearly four months after beginning.

I still need to find interior shelves for our Monitor Top and repair the warn out handle, but we have, for the most part, a fully restored GE Monitor Top Refrigerator. According to AntiqueAppliances.com it is worth somewhere between $2400 and $3400. I would be hard pressed to sell it for $10,000.
Wow... I must, if you are still reading, apologize for the long winded post, but I think it is apropos given the long saga that it describes. There is beer cooling in the fridge. If you've read this far, and followed my convoluted monologue, you are welcome to one. We can drink to the state of the art refrigeration unit of nearly a century ago! Cheers...
It turned out great. Well done to all of you!
ReplyDeleteWow Steve, I admire your efforts tremendously! That refrigerator is SWEET - seriously a work of art. Who knew a chilly-bin could be so COOL? I can see why it's the "hub" for the rest of the remodel. I can't wait to see it all.
ReplyDeletevery cool Steve!
ReplyDelete