Wednesday, February 1, 2012

The Museum Wall

When you hail from a big family (think three siblings and three sibling's spouses) Christmas shopping can be challenging. We've solved that problem in our family with a Christmas drawing. Every year, the grandkids... my boys along with my nieces and nephews... place all of the adult names in a hat and draw them out to determine which adult buys a gift for which other adult.  Pretty simple... probably a variant on many a family's tradition. To further simplify the process, no Christmas lists are allowed. No one can request, hint, or otherwise state what they desire as a gift. Instead, a theme is chosen, and one's gift must fit within the theme. In the past, themes have been water, sports, and outdoors among others.

Fitting a gift into the theme and making sure that the receiver of the gift actually likes the gift can be a challenge in itself. But, that may be part of the fun. Sometimes one has to get pretty creative. For example, I was chosen to buy a gift for my sister-in-law the year that the theme was outdoors.  I could have bought her an umbrella or a jacket or gardening tools. Instead, knowing that she already had and umbrella, gardening tools and numerous jackets, I bought her a gift certificate to a local day spa. The catch was that, when it came time for her to open her present on Christmas Day, I made her open her present outside.  Get it? outdoors... outside! I am so clever!

This Christmas past, the theme was antique. My younger brother received a wood and brass fly reel from the distant past. My dad received two tickets to a Tony Bennet concert, and my sister-in-law received very old black and white pictures of distant ancestors, carefully mounted in antique frames. I received one (1) antique snowshoe. Caren received a matching one.

Immediately I began picturing The Museum Wall...


We mounted the snowshoes above our barnwood coat rack and began cruising Craigslist and Ebay for the skis and poles. I wanted to put an antique ice-axe on the wall as well, but we seem to have run out of room. I haven't given up entirely on the ice-axe, but it will probably end up on a different wall.

It seems a little cliche, having antique skis and snowshoes mounted on the wall in a Tahoe cabin, but each piece speaks a little bit to the history of the sports we love to do, so we are more than happy to display them in our little house.

Believe it or not, mounting the skis and poles on The Museum Wall was all the work that I completed last weekend... Instead, I skied and hiked in the snow.

Wednesday, January 18, 2012

Can You Find the Differences?

People magazine includes a game of sorts in each of its issues. Two nearly identical pictures are posted side by side, and the reader is asked to find ten differences between the two pics. Below is my version of that game. But, be warned, my version of the game is much more difficult than the simpleton version that People publishes... Best of luck!

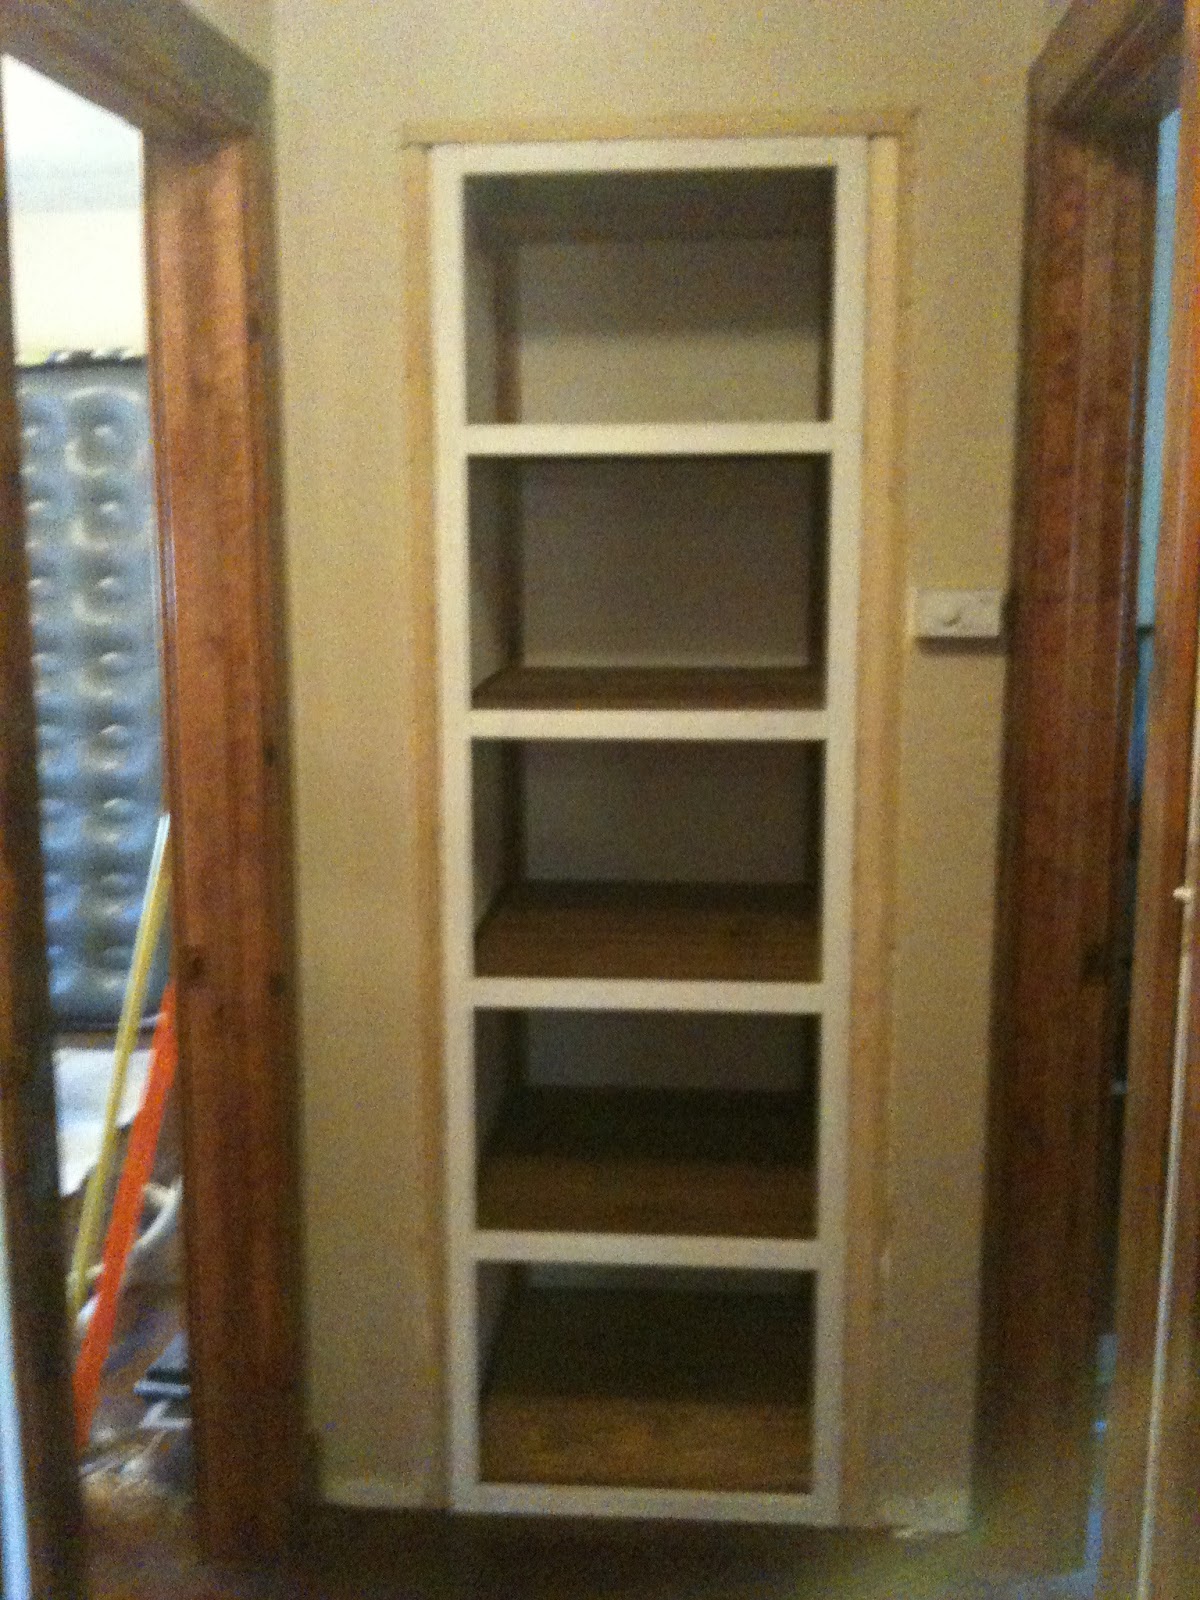
We have fondly named the closet at the end of our modest hallway The Cat Closet. It is an interesting moniker, maybe telling, considering that Caren and I are both dog people. In fact, I detest cats. Perhaps that has something to do with my being deathly allergic to them... perhaps it has something to do with their not so pleasant habits of... well, potty talk may better left to second graders.

When we first purchased the place, The Cat Closet had a doggie door haphazardly installed in a hollow core door... yet another case of interesting craftsmanship. Inside the doggie door sat a kitty litter box--one that hadn't been cleaned since Lord knows when. Kitty litter had made its way out of the box, through the carpet, and into the sub floor. It was also inside the void in the hollow core door and everywhere else that kitty litter shouldn't be. Besides the kitty litter, the subfloor was urine soaked and reeking of ammonia.

The first picture, look carefully, was taken last August, shortly after we had ripped the carpet out, removed the door, and pulled the sub-flooring. Pay attention to things like paint color, trimwork, and flooring.

The second pictured was taken in December. If you are observant you will notice several changes... one thing you cannot see is the paint on the floor decking underneath the new hardwood floor... oops, did I just give away something? Caren painted the floor to seal any remaining urine scent into the decking before we put the new floor down.


Our third picture was taken three weeks ago. The pine paneling.. Oops, gave away something else... hides a return air vent for the furnace that one can just make out on the right side of the closet in the second picture... shoot, I keep giving away things. Installing the paneling involved building two false walls, one on either side, because I'm a symmetrically leaning perfectionist, to hide the mechanical workings of the heating system.
Notice any changes yet?

This, our fourth picture (I told you that my version of the game was more difficult than People's), was taken two weeks ago.

We have a fence across the back of our lot in Davis that separates the lawn from the alley. The fence is about four feet high. Redwood fence boards are sold in six foot lengths. If one planes and sands the two foot long cutoff ends of rough cut redwood fence boards, one can make nice shelving out of what could have been considered trash or firewood.

Additionally, if one waters down white ceiling paint, one can whitewash pine paneling to match what one did in the kitchen.

Editors note: the above two scenarios are hypothetical only and the reader should not interpret them as hints that might help them in solving the picture puzzle.


Again, our fifth picture was taken two weeks ago. Did you know that t&g cedar siding that Kelby salvaged from the backyard when we first bought the place in September can be made into cabinet facing, especially when Caren white washes it.


And, our sixth, and final, picture. Look really carefully. Do you notice any changes? One must be really observant. They are difficult to find, but they are there.

By the way, salvaged t&g cedar siding makes excellent cabinet doors.

If you are financially inclined...

salvaged redwood fence boards: $0
salvaged t&g cedar siding: $0
2x4 false walls: about $8
hinges: about $15
pine paneling: well, we won't go there
100 year old barnwood trim: PRICELESS

All told, I think I spent about $100 bucks on The Cat Closet... that and about four days worth of labor.

So, can you find at least ten differences between the photos?

Oh... in case you were wondering... the only time I ever read people magazine is when I am waiting in line for a haircut at SuperCuts. Even then, I only look at the pictures of all the "pretty" people.

Thursday, January 5, 2012

More Barnwood???

We have plenty of barnwood stacked in the garage to complete all of the trimwork and make the various shelves, picture frames, and mirrors that we have dreamed up; however Caren got a lead on another old barn from a client. She finagled permission for me to drive out onto the property to take a look. She even got the key to the locked gate so I wouldn't be peppered with rock salt by some shot gun toting ranch hand.

The barn, as we were told, was already on the the ground, so anything was fair game. The property it once serviced sits at the intersection of highway 16 and highway 20 just west of Williams. We'd have to access the property through the front gate and follow a rough dirt road for about three miles before finding the barn.

Last Tuesday I loaded up my tools of destruction... sawsall, various wrecking bars, various hammers, and cordless drill... as well as Theo. Theo and I have a love hate relationship. He loves me. I hate all the hair he sheds, his hyperactivity disorder, and his inability to listen to a thing that you say. I figured I'd take him with me and we'd have a little bonding experience. Caren wasn't sure what to think. I'm sure that one of the thoughts that crossed her mind was that I planned on leaving him out in the sticks somewhere... about as far away from a road as one can get in Northern California.

Finding the gate was easy. Getting through the gate was easy. Following the "rough dirt road" was not so easy. The road started out as a two lane gravel road. after about a hundred feet it became a one lane dirt road. After another hundred feet it was a jeep track... with grass growing in the wheel ruts.

Theo and I, being the adventurous souls that we are, followed the jeep track. Over hill and around dale we went... at a snails pace. We made our way across dry stream beds that I was sure would bottom out the truck. Soon we began spotting sun-bleached cattle skulls and vertebrae alongside the road. Two thoughts crossed my mind: What have I gotten myself into? and This might be a good place to let Theo out of the truck!

Rounding a corner and crossing another stream bed, Theo began to growl. Two rather large cows stood in the middle of what, in a very nefarious way, could be called a road. They bawled out a little protest to our being there but graciously stepped out of the way. They did however decide to follow the truck rather closely. I think they thought we were the feed truck... either that or they were herding us into a trap.

On we pressed. Soon our two friends were joined by three or four others. Then five or six more. Not long after that a very large cow stood right in the middle of the "road" in front of us. Had we been going much faster than the three miles and hour that we were, we would have been unable to avoid a collision. One that I'm sure the cow would have been none the worse off for. Caren's truck, however would not have faired so well. The cow was large. To add to its size, it stood nursing a calf. Not really a calf... it could have been considered a full grown cow in my book.

Theo growled, and I waited patiently for the lunch break to end. It didn't. I thought about honking the horn but thought better of that idea when I pictured a ranch hand with a shotgun loaded with rock salt becoming annoyed with me for bothering the cattle. After a minute or so an idea occurred to me. Because we were in the middle of an oak savannah and because the road wasn't really much of a road, I could just drive around the cow cafe.

On we went. Just as I was beginning to lose hope that we would ever find the barn, the "road" ran out. It was no longer a jeep track. It was simply a cattle path... a single track cattle path. I gave Theo a what-now look. He returned a just-drive-up-to-the-top-of-that-rise-and-have-a-look-around look. That is what I did, and, low and behold, off in the distance was what appeared to once have been a barn. There was no road leading to it, but that didn't matter because we were no longer driving on a road anyways.

In short order we arrived at the barn and stepped out of the truck only to be pleasantly greeted by a large... I mean very large... I mean much larger than the cow and its calf large... bull. Fortunately the bull was on the other side of a barbed wire fence, but he left no uncertainty as to his displeasure with us being there. He began to bawl and continued to bawl for the hour or so that I rummaged through the remnants of the barn. I carried  a large hammer with me the entire time I was there, making sure that I never had my back to our new found friend. Theo, demonstrating all of his love for me along with his willingness to lay down his life in the name of that love, promptly hid under the truck.

 There wasn't really much to the barn... or much left of it. I tried, I really tried, to envision something that we could do with the wood, but I kept coming back to the thought of how much work it takes to turn barnwood into a finished product.

After picking through, wandering around, and climbing over the pile I gave up. Other than the large hammer that was my only defense against a charging bull, I never even got a tool out of the truck. I simply was not willing to pull anymore nails, plane, or sand another piece of wood if I didn't have too. And, I didn't have to do any of that to this pile of wood if I didn't want to. Did I say that I didn't want to?

Theo was more than happy to jump back into the truck. The bull was more than happy to see us leave. I was more than happy to not pull anymore nails.

Greg Brown's song, You Drive Me Crazy (but I love you so much that I am gonna drive you crazy, too), was running through my head as I reached over a scratched Theo behind the ears, started the truck, turned it around, and headed back to civilization... without any more barnwood.


Tuesday, January 3, 2012

Unfulfilled Expectations

I had big plans for Christmas Break... In addition to a trip to Seattle to see the family, I would have five uninterrupted days in Tahoe to get some real work done around the place. In my mind, I would finish three custom closets, trim out the interior doors and hallway, build a few pieces of furniture, and maybe replace the hot water heater. In reality, I built one piece of furniture, and trimmed out most of the hallway. I also took long walks with the dogs, finished reading The Great Crash Ahead* and delved well into Steve Jobs' bigoraphy.** 

Alex laughed at me because it took me a whole day to produce this...


One of the drawbacks to having a freestanding kitchen is that there are no base cabinets to hide unmentionables like cleaning supplies and garbage cans. We've solved the cleaning supplies issue. We needed some way to hide our kitchen garbage and recycle cans.

I spent and evening several weeks ago designing and redesigning a piece of furniture that would solve that problem. It is loosely based on a piece I found on Ana-White.com. However, I modified her design to match the construction of the pie safe and jelly cabinet that we purchased. It took several iterations in the design process to come up with a cabinet that fit well into the space under the window and didn't make it feel like the pie safe was shoved into the corner. I originally designed the cabinet to hold both the recycle and the garbage cans, but the piece became too large. So, I guess that I have only solved half of the problem because the cabinet only holds the garbage can.

The front of the door pivots out from the bottom, allowing access to the trash receptacle. I finished it with the same red paint that the other pieces of kitchen furniture are finished in, added matching hardware, and stained the door and top to match the rest of the furniture as well.

I'm pretty proud of the results. Although it is not perfect, one would be hard pressed to determine that my little garbage can was not purchased from the same manufacturer as the pie safe and jelly cabinet.

I say that Alex laughed at me because it took so long, but, in my defense, this was the first time that I'd built a piece of furniture with an inlaid panel door. I also chose to build the top rather than purchase a pre-fabricated one. When I began the whole process last Thursday morning the cabinet was simply a pile of pine boards... a 1x12x6', a 1x6x8', and four 1x4x8' boards to be exact. Throw in a couple of hinges, a handle, some leftover t&g panelling from a long ago project, and a whole days worth of labor and you too can have your very own garbage can.

Now that I think about it... given all the time that I am spending on this whole project... well... it must be a labor of love.

Labor... Love... whatever it is, it drove me to spend the better part of three days milling the door casing and trim boards for the hallway. Day one: pull nails; day two: rough cut to size and plain; day three: sand and sand and sand and oil and oil and oil.

There is so much work involved in turning old barnwood into trim. The first few times that I set up the trim shop it was a new and novel process. The novelty has worn off. This time I found myself cussing Jessie, the purveyor of barnwood, out in my head during the whole process. But, once I started oiling the wood all was forgiven. The stuff turns out so beautiful and unique.

I am still dreading the next time I have to set up the trim mill to finish the windows, bedrooms, and bathroom; but, I am willing to do so because the final product is so cool. That, and I am kinda OCD about finishing something that I started...

I was looking forward to the installation process because I would finally get to see the fruits of three days worth of labor. The process was not without its foul-ups, bleeps, and blunders... not the least of which involved hacking out chunks of wavy drywall to insure a tight fit between casing and jam. Its hard to take a picture of a hallway, but this is how it turned out.


It is easier to take a picture of a bedroom door...


Pay particular attention to the unfinished closet at the end of the hall. If the picture of the bedroom door included the closet, you'd see that it is unfinished too. But the dogs liked their walks, and I'm having a hard time putting Jobs' biography down.

 * not a particularly well-written book, but Dent's take on the future of our economy is very insightful. Dent may not be an author, but he is a skilled economist.


** Jobs' biography is a must read. The guy was pretty amazing. If I'd known what I know now, I'd have purchased a lot more of Apple's stock when it was cheap.

Thursday, December 22, 2011

Bits and Pieces that Add Up to Big Changes

Christmas break, among other things, means that I have three weeks off of work. We spent the last four days up in Tahoe working and playing. We didn't have any major projects in mind, but we did do a little interior decorating...

I promised a picture of the dish rack... here it is. We went thru several evolutions on design. Originally, it was going to be made out of barnwood from the Corning tear down and an old window from the Davis house. We went as far as building the frame work for it, but it just looked to bulky once we made it large enough to accommodate eleven inch plates. Back to the drawing board... we finally decided on open shelving. The final design is pictured on the right. It still incorporates the Corning barnwood, but we left the window out.

I cut all of the pieces and Caren sanded and pre-finished them before the final assembly. The dark walnut oil contrasts the white barnwood nicely, don't you think?

Caren added the lanterns to break up the vertical stack. The lanterns had been collecting dust in Davis after we purchased them from Ikea for an idea that never came to fruition several years ago. The dishes are from Walmart of all places... one can't find everything on Craigslist.

We also added matching shelves above the dreaded corner to tie the kitchen together. Same process... construction by Steve, finishing by Caren. Caren is having a lot of fun moving items from shelf to shelf trying to get everything just so.


If you place the next two pictures side by side, you can see the general layout of the entire kitchen.


Notice the chandelier? That was another one of Caren's Craiglist finds. It came without the glass and without any mounting hardware, but we are getting pretty good at problem solving. It is mounted on two five inch by five inch squares of the same barnwood that the shelves were constructed from. The big swag of chain saved me from moving the electrical work and repairing the ceiling.

Speaking of electrical work... I cut this hole in the drywall several months ago, knowing that eventually I'd install switches to operate the kitchen and hallway lighting. I also knew that installing the switches would mean crawling around in insulation in the attic.

When Kelby and I completed all the electrical work for the kitchen outlets, we also ran wiring for the lights. That made installing the chandelier relatively easy. The hallway light is a different story.

Our hall is all of six, maybe eight feet long. One really doesn't need a switch for the light at each end. I've never installed three-way switches before so I kinda liked the challenge.

The internet is a marvelous thing. After googling "wiring a three way switch" I found the perfect tutorial, wiring diagram included. After fishing around in the wall to run the 4-wire connection between the switches, we had switches at each end of our grand hallway. And, both operate the light!

While I was up in the attic I figured that I might as well run the wiring for the two kitchen lights. After much hemming and hawing at Lowe's and Home Depot, Caren and I finally decided on the semi-flush mounted fixture seen at the left. The one pictured over the refrigerator and pie safe involved cutting in a new electrical box and running the wire to it. There is a matching one above the sink and stove on the right side of the kitchen. Installing it involved cutting in a new electrical box, running wire, and patching the hole where the old kitchen light had been. The old light was mounted far too close to the wall and was not centered over the window. The new location is centered on the window... My OCD inner-self is finally at rest!

Oh, we also got around to building the pot rack to hang all of Caren's copper pots.

Two one by four barnwood boards, thirty-six inches long, held together by six inch black, antique carriage bolts that match all of the other iron work, with one inch copper pipe acting as spacers. I mounted 5/16th dowels on the top to hold the lids. The hooks, now just dime-a-dozen cup hooks, will be replaced by hand-forged, twisted iron from a blacksmith in Maine... Ebay is a wonderful thing. They arrived today and match all of the other iron perfectly. The rest of the hardware is not so cool... just simple eye bolts and hooks spray painted black.


Another pot rack shot...


Finally, the interior doors. All of the doors in the house were cheap hollow core painted white. They were cracked and warped. They hung crooked. On some, the hinges were installed upside down. One had vents in it, cut to provide oxygen to the hot water heater. Another had a doggie door cut into it so a cat could access its litter box. In short, they were all a train wreck and needed to go. Above, one can see them loaded into the back of the Caren's truck shortly before I hauled them too the dump. I love going to the dump... it is such a cleansing experience.

Anyways, we splurged and bought four panel knotty pine interior doors quite awhile ago. We finally got them installed. I've hung a few doors in my time, but always forget where to place the first screw to make squaring and plumbing them easier. Should it go in the top, hinge-side corner? At the center hinge? I'm sure there are many schools of thought on the subject. By the time I'd hung three of the four doors, I finally had it figured out. Talk about your learning curve. The first door took about an hour, the second one about half that. By the time we were onto the last door, it was a fifteen minute process.

Once we had all the doors hung, Caren sanded, and sanded, and sanded... all by hand. Then she rubbed on a coat of dark walnut oil. By that time, she looked pretty knackered so I figured I'd give her a hand by adding a second coat of red mahogany. The doors looked great after the first coat of walnut. The red on top of that really made them pop. Caren will add one more coat of clear oil next weekend and finish the process by applying a rub on polyurethane. I think I will let her do the rest of the finishing on her own. I was pretty knackered after applying the red mahogany.

So, lots of little changes, but when one adds up the sum total of the dish rack, the lighting, the pot rack, and the doors the appearance and homey feeling of the place has changed dramatically. It really does feel like a home now!

Wednesday, December 14, 2011

You Say Its Your Birthday -or- Slave Labor

Last Saturday was Caren's birthday. Alex, Kelby and Taryn came up to Tahoe to help us celebrate. All the celebrating means that we didn't get too terribly much done around the place. Instead, we took Caren out to Freshies, a Hawaiian restaurant in SLT. The food was really good, the dessert was... well, if I'd known the coconut cream pie was so good I would have skipped the teriyaki stir fry and had a whole pie for dinner.

Amidst all of the celebrating, I did put the kids to work in the finishing mill. The weather has been unseasonable and there is no snow on the ground, so I moved the mill back outside...


After helping with the table saw and planer, the boys went to work with the sanders. There was some talk about forming a union and striking, but I quelled that nonsense by suggesting that I might charge rent if they didn't get back to work. 

Notice the bench top that they are working on. It used to be the front door. The new front door can be seen in the photo below, with its temporary trim... see my previous post about temporary trim on the backdoor if you are wondering why it is temporary. Caren and I both like how the new front door changes the look of the place and are pretty excited to get the new siding and windows installed next spring. 


Taryn helped me pull nails and oiled all of the newly sanded trim. It is amazing how much faster things go when the labor force is quadrupled. We had most of the trim ready to finish the living room by mid morning.

Then we spent the next few hours putting it mostly in the right place. I say mostly, because we changed plans on the install about two-thirds of the way thru so a few pieces ended up looking pretty mickey moused into place. I knew I wasn't gonna sleep well... 

Sunday morning, Alex and I attempted to fix the mickey mouse job. Alex is happy, I'm not. Most likely, I will be tearing the whole shebang out some day soon and doing it right... I hate being OCD.

Somewhere in the midst of all the trim work, Alex and I put together the dish cabinet that is currently sitting above the refrigerator and pie safe. I thought Caren took pics. She thought I took pics... We don't have any pics. But, I will take some next weekend and post them because the dish cabinet is something that I am very happy with... something that I won't have to tear out and re-do...

Tuesday, December 6, 2011

Of How We Have Come to Have an Operating Refrigerator

I have been looking forward to writing this post for more than a little while. In fact, documenting this process may have been the genesis for this entire blog...

So, let me take you back several months...
Shortly after we closed on the house, Caren and I found the Detroit Jewel Stove on Craigslist, and, of course, we ended up buying it. We didn't know it at the time, but with that one action, we set a whole chain of events in motion. The era for the decor was set with that one simple purchase.

The first problem we ran into was how to find a refrigerator that fit the 1920's motif. Refrigeration was not even mass produced until the late years of that same decade. Most homes had ice boxes, and ice was delivered much like dairy products were delivered when most of us were growing up. Ice deliveries would have been rather hard to come by (at least during the summer months), so we figured an ice box was out of the question. However, rumor had it that turn of the century ice boxes had been converted into refrigerators, so I started poking my nose about.

Conversion ice boxes were way, way out of our price range, but I did, with Caren's help, discover GE Monitor Top refrigerators.

The first Monitor Tops were produced in 1927 and sold as an add on to one's electric bill. GE would add $10 to each month's bill until the refrigerator was paid for in full. A new Monitor Top went for around $300. By comparison, a Ford Model T went for about $450 during the same era. None the less, GE sold over a million refrigerators... making the Monitor Top the first mass produced home refrigeration unit. It is interesting to note that the units were not named Monitor Top by GE. That moniker is a nickname bestowed on the refrigerator because of its resemblance to the turret of the USS Monitor, the Civil War era ironclad battleship.

What could be more perfect than a refrigerator that met our decor demands to the t? I started looking into pricing. A fully restored Monitor Top will cost you between $2400 and $3400. That is a pricy fridge. Fridges in as is condition run anywhere from $250 to $1000. National searches for Monitor Tops on Craigslist were not inspiring... Most of the adds showed pictures of rusting hulks and ran copy that said something like, "I think it worked last time I plugged it in... during the Eisenhower years."

I was about to give up the search and was trying to figure out a way to talk Caren into a $1400 partially restored unit that was for sale in SoCal... partially means "It still runs, and we gave it a coat of spray paint." when I found an auction on eBay for a working Monitor Top in Sacramento without a reserve on it. No reserve means that there is no minimum price that the seller will accept. If the top bid is $1 that is what the piece sells for. I placed a maximum bid of $120 and ended up winning the auction with just $108.

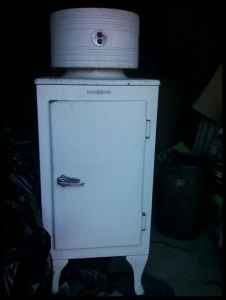
Within hours Kelby and I were at a storage facility in Sac exchanging cash for a very heavy refrigerator. That very fridge is pictured as we first saw it in the photo above. The seller was the granddaughter of McClatchy of Sacramento Bee frame. The Monitor Top we were purchasing was the household refrigerator in the McClatchy residence for years. Supposedly it still ran, but it had definitely seen better days. The door was stuck shut as the seal had long since glued the door to the box, there were minor rust spots, dents and dings, and the wiring was cracked and frayed.

By the time we had the refrigerator loaded into the back of the truck, we had tipped it over (it is very top heavy) and broken the cord that supplies electricity to the refrigeration unit.
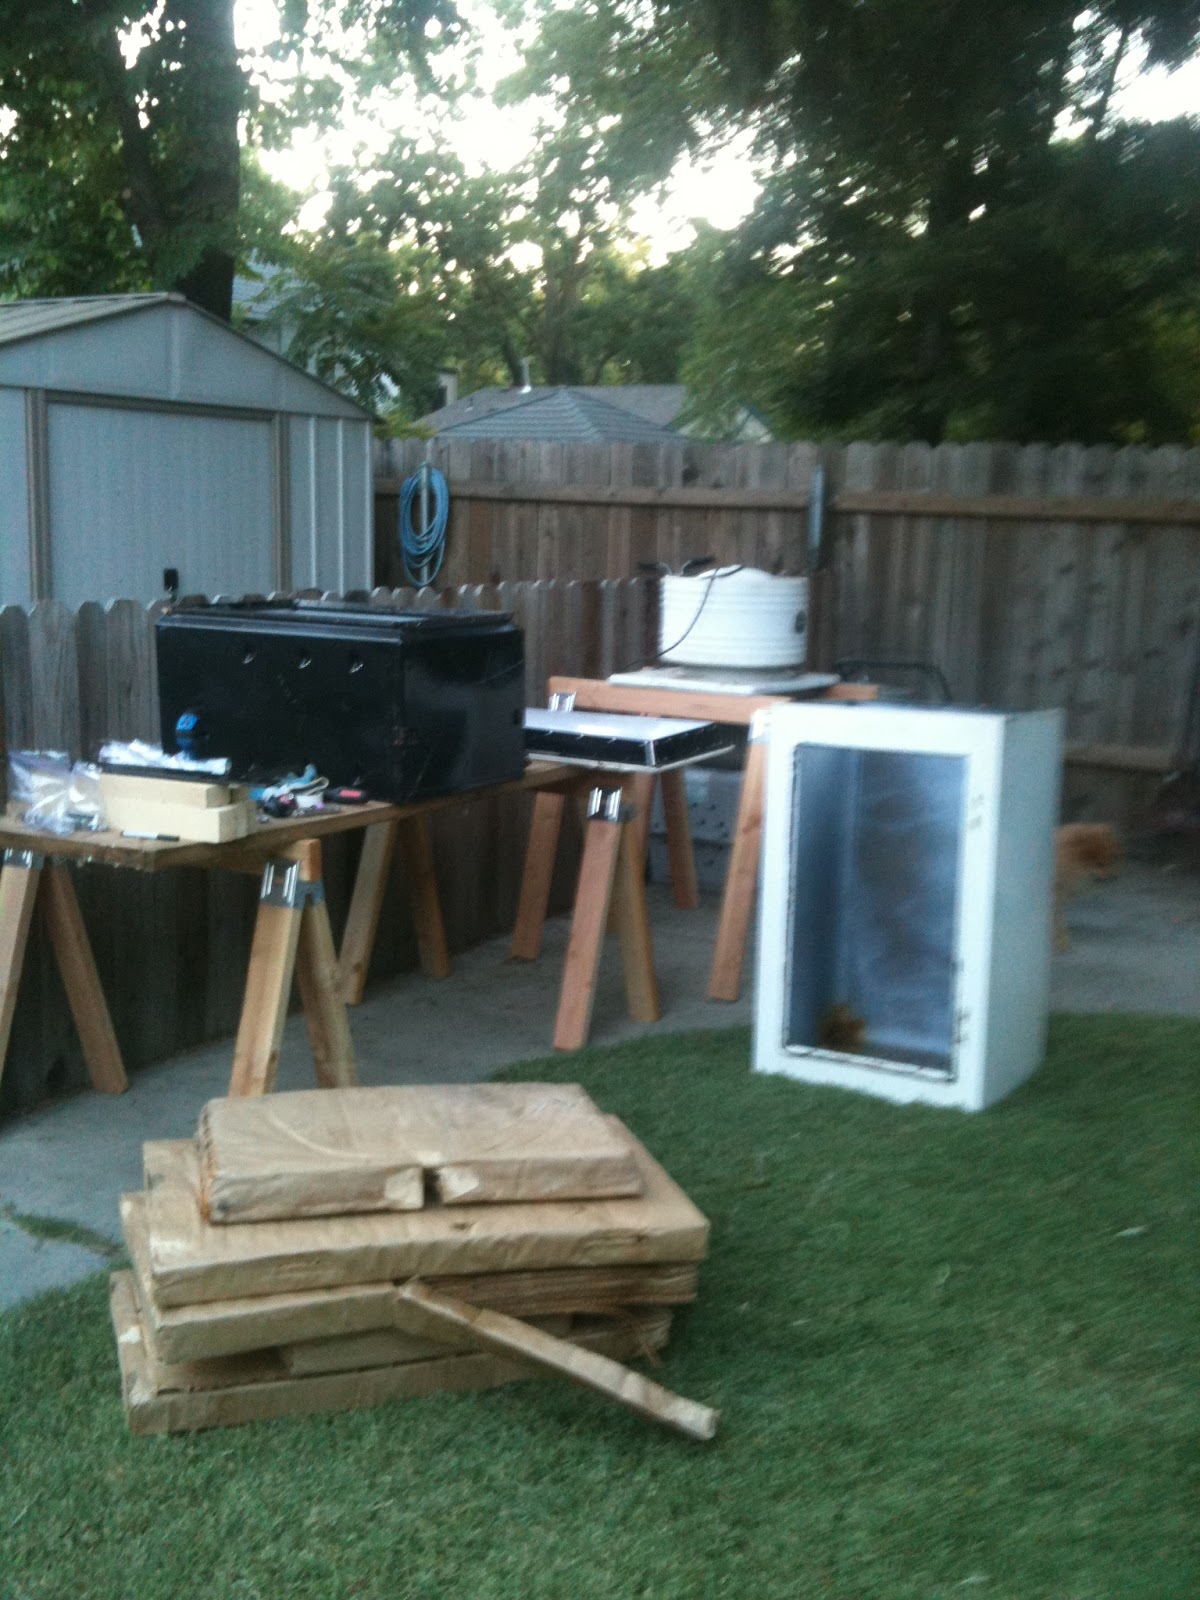
Shortly after we brought our purchase home, it looked like this in the back yard.

But... before I began dismantling, I repaired the cord enough to supply power and plugged the Monitor Top in... and listened to the sounds of silence. No humming, no whirring, no clunking... nothing but silence. I checked my electrical repairs and resigned myself to the fact that Kelbs and I broke the unit when we tipped it over, or it wasn't working when we bought it... Caveat emptor! (another dollar for you Zach if you can translate that)

About that time Caren came outside, and I expressed my disappointment. She asked if I had turned it on while flipping the switch... hum, whirr, clunk. Oh sweet cacophony of noise.

Soon I was digging into the piece to see how much restoration I could do on my own and how much I was going to have to farm out.

The mechanical and wiring I could do, the paint and enamel I could do, but not well, the refrigeration nobody could do, at least legally. Fortunately the refrigeration was the one part of our Monitor Top that did not need work. After Caren flipped the switch from off to on, the ice box began to frost up almost immediately. That was cool, literally. Anyways, had Kelby and I broken the refrigeration lines we would have been out of luck because Monitor Tops use sulphur dioxide as a refrigerant. Sulphur dioxide causes blindness and is caustic to the lungs. Sulphur dioxide was outlawed as a refrigerant in the 1930s. Nobody repairs sulphur dioxide refrigeration units.

Very carefully I continued dismantling my baby. I considered having an autobody shop paint the whole thing. I considered spraying it myself, I decided to have it powder coated. Powder coating requires that the unit be heated to 400 degrees. All the plastic, insulation, wiring, and aluminum had to be removed. It took me two days of removing pieces one at a time, diagramming and labeling as I went... legs, interior box, exterior box, top, insulation, wiring, handle, badges, door panel, plastic trim, latch, light switch, seals... there are a lot of parts to a refrigerator.

All American Powder Coating did an amazing job. Shiny white, no runs, no drips, no errors...

And re-assembling the exterior was easy...


Assembling the interior was not so easy.


The left picture above shows the door and exterior box before any insulation or panels were installed. The right hand picture shows the door panel and insulation installed. Notice all the shiny silver rivets holding the black plastic that attaches the panel to the door??? Originally they were aluminum screws. When I dismantled the door and box about half of the screws stripped out, twisted off, or were seized up. I had to drill out far too many to count. As I drilled each one out, I wondered how difficult it would be to tap the holes when I replaced the screws... until I thought of rivets. The rivets were much easier than tapping new threads, but still it was a labor intensive process. There are a lot of them. After insulating the box with rigid foam panels and spray foam, the same process that attached the panel to the door was repeated to attached the interior box to the exterior box.

It took three or four days of work, but soon all that I had left was this...


This a close up of the refrigeration unit after I had stripped it of all its wiring, insulation, and decorative badges. Notice the icebox still attached, as are the delicate refrigeration lines. Notice also that there is no powder coating. The refrigeration unit could not be heated to 400 degrees because of the refrigeration lines full of caustic sulphur dioxide. Spray paint was my only option for restoring the unit. All American Powder Coating supplied me with the paint to match the powder coating. After carefully transporting the unit to Tahoe, I was able to spray the refrigeration unit. There are a few runs, drips and errors, but the color and finish matched the powder coating perfectly.
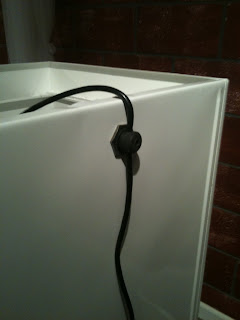
And now for the wiring... the wiring was not easy, it was not hard, it was most difficult... After numerous trips to Lowes and Home Depot and ACE and Hibbert, I started with the easiest of the difficult. The cord that runs from the wall outlet to the refrigeration unit is split by a plug that powers the interior lighting. The plug was in bad shape, but I couldn't find a suitable replacement online or in store. I was left with no other option but to rebuild it. So I bought a soldering iron and rebuilt it. Soon enough, with Kelby's help, I had an operating interior light. On to the more difficult of the most difficult...


My wiring diagram,  drawn months before, was all I had to go by...


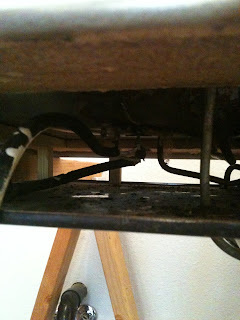
My work space, remembering that I couldn't remove the refrigeration lines, was very limited...


It took me several hours and Caren's tiny hands to get the new wiring routed, soldered and connected before I was ready to test my work out. I plugged the unit in... no humming, no whirring, no clanking... and I remembered to flip the switch. What did I do wrong. Several more hours of testing and rewiring and still no humming, whirring, or clunking. Frustration... I was near the point of giving up and concluding that we had broken something in the motor during all the months of handling and transporting. Disappointment! All for naught?

Out of desperation, I fashioned a jumper out of a spare piece of wire and began jumping connection points... Jumping connections is almost a sure fire means of shorting out the motor or frying the wiring. It was an act of desperation... a spark here, no spark there... what's that? A hum? A whirr? A clunk? Jump that connection again. Hum, whirr, clunk. "Caren, put your hand on the freezer box, is it getting cold?" Ah, sweet relief!!!
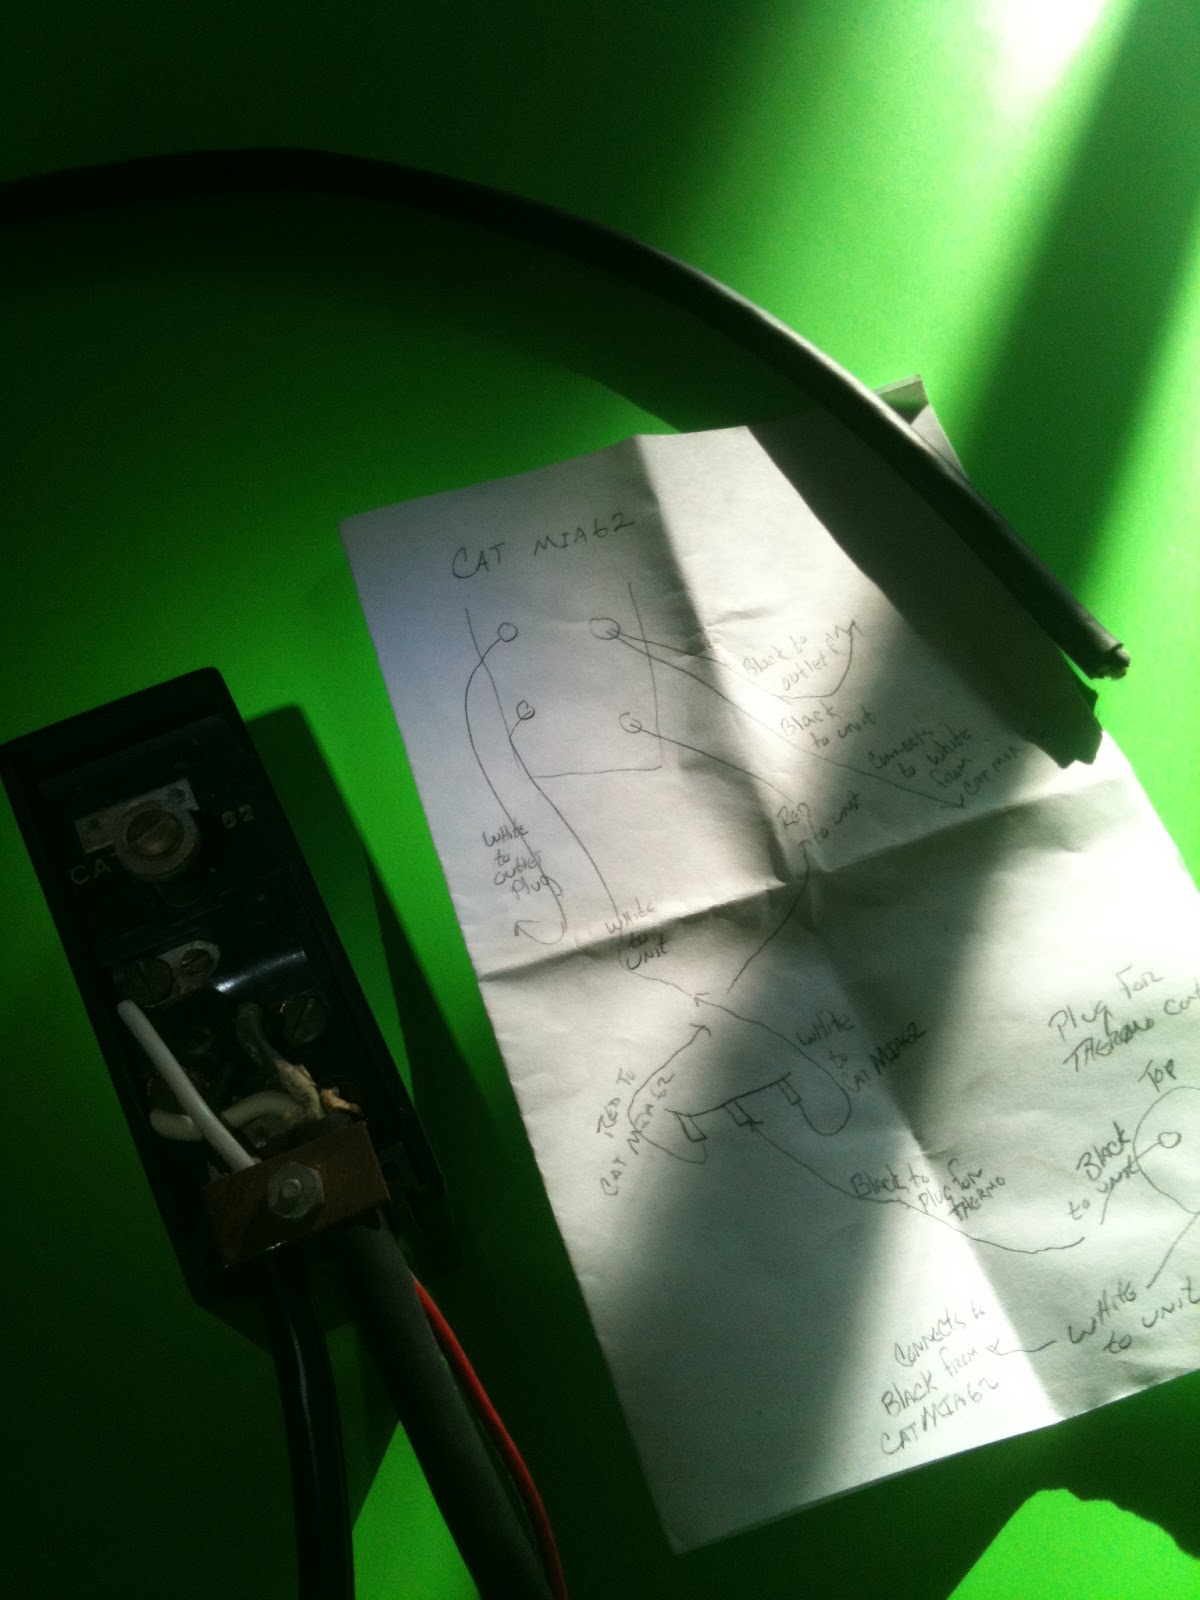
If you look closely at the wiring diagram picture you will notice two white wires attached to the control unit. Despite my careful diagramming all of those months ago, I mis-diagrammed the attachment point for the two white wires. After switching them, the refrigeration unit work just as it did the day it rolled out of the factory over 80 years ago!


Tom, the neighbor, helped me lift the 150 or so pound refrigeration unit and place it on the box. The long saga was finally complete... nearly four months after beginning.


I still need to find interior shelves for our Monitor Top and repair the warn out handle, but we have, for the most part, a fully restored GE Monitor Top Refrigerator. According to AntiqueAppliances.com it is worth somewhere between $2400 and $3400. I would be hard pressed to sell it for $10,000.

Wow... I must, if you are still reading, apologize for the long winded post, but I think it is apropos given the long saga that it describes. There is beer cooling in the fridge. If you've read this far, and followed my convoluted monologue, you are welcome to one. We can drink to the state of the art refrigeration unit of nearly a century ago! Cheers...